Featured

Sesame-Crusted Tofu with Thai Dipping Sauce

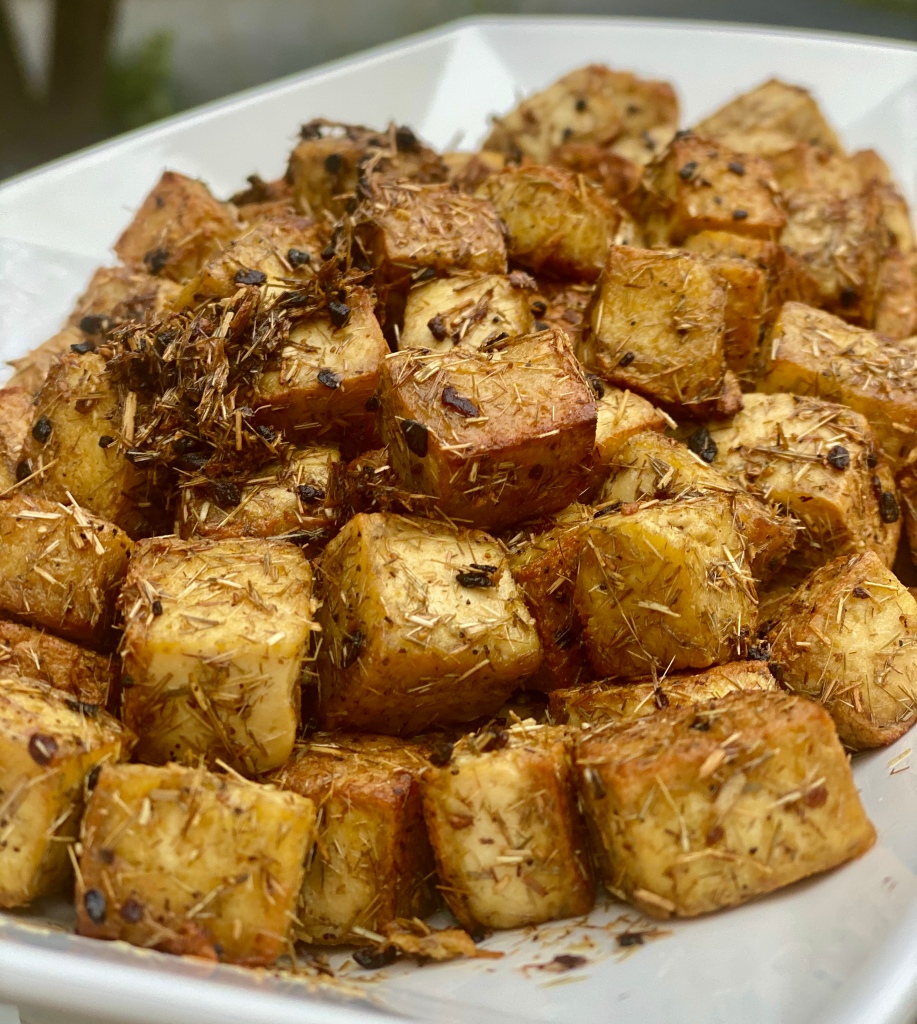
Let’s face it, some dishes are about the sauce. I never realized until I started following @itsmetinx (who I’m obsessed with) that some people are just like insane sauce/condiment enthusiasts. I am one of those people! Yes the tofu is an important, and delicious, part of this recipe, but it’s really the tangy AF umami dipping sauce that I would keep on speed dial.

SHOPPING LIST: 2 packages of extra firm tofu, brown sugar, chopped garlic, scallions, green chilies, rice wine vinegar, fish sauce, soy sauce, lime, sesame seeds

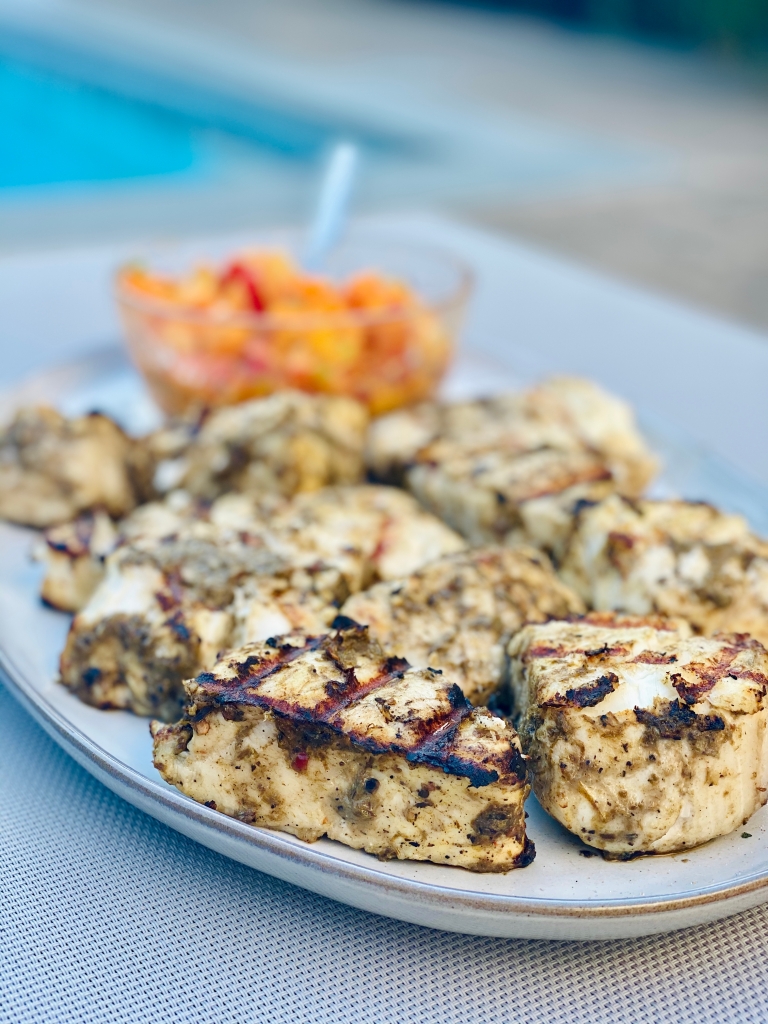
Slice your tofu cubes horizontally into 3 equal “steaks” and lay the tofu slabs into a flat container. The firmness of the tofu is important here, so if you can’t find extra firm tofu I’d skip this all-together. Since tofu is so bland to begin with, you want to to cover your steaks in soy sauce and then allow the steaks to soak for 1-3 hours to really absorb the soy flavor. (If you’ve got the time, giving the steaks a couple flips during this time will help for even absorption.)

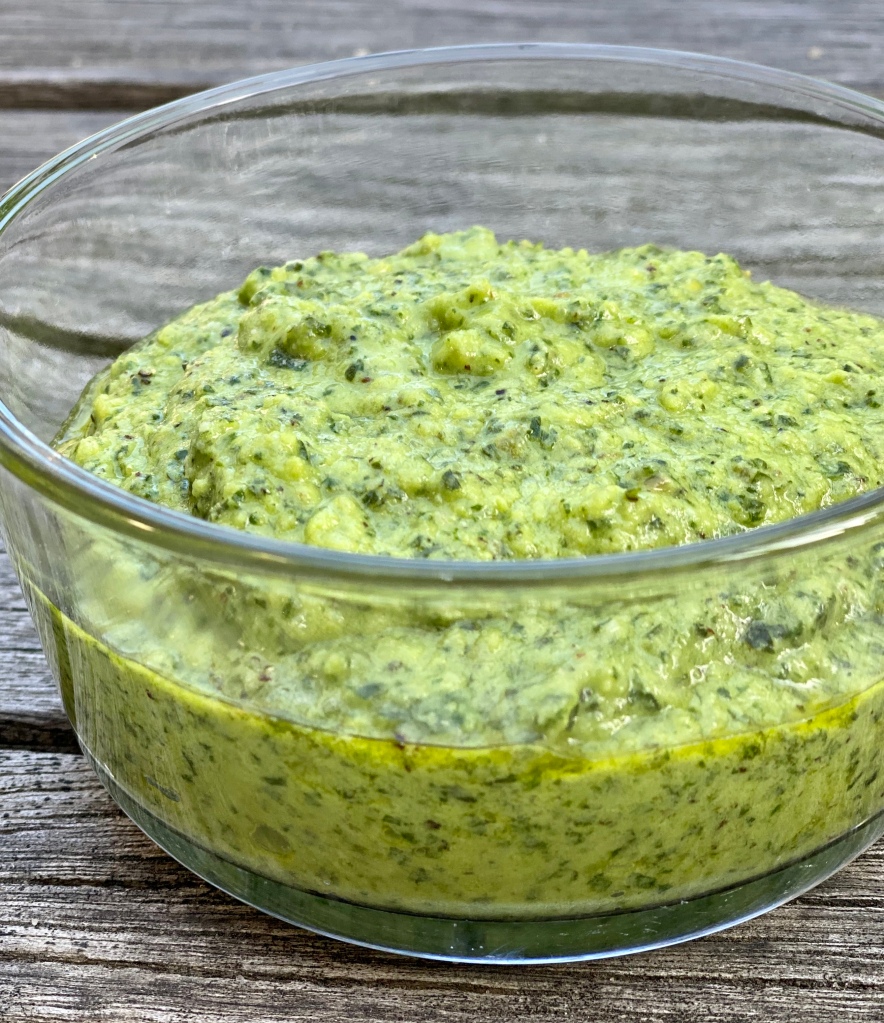
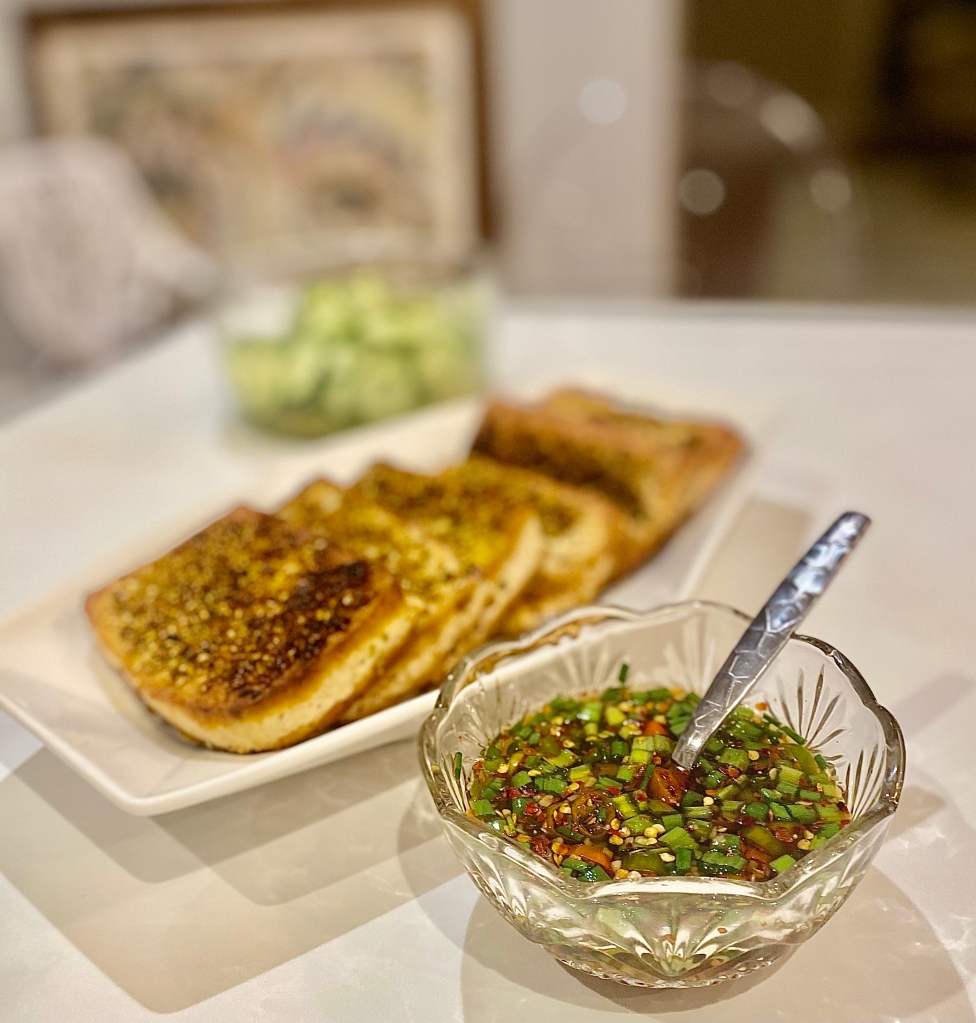
While your tofu steaks are soaking up the soy, let’s turn to the aforementioned main event. In a small bowl, combine 1 tsp. brown sugar, 1 tB. chopped garlic, 2 tB. chopped scallions, 2 chopped green chilies, 2 tB. rice wine vinegar, the juice of one lime and 1 tsp. of fish sauce. Whisk it up with a fork and add a pinch of salt if you so desire. This dip works amazing with dumplings or any sort of fried Asian-esque bite.

In a cast iron skillet (or flat saucepan), add about 1/2 inch of vegetable oil and place over high heat. To finish your tofu, remove the steaks from the soy sauce and place them flat on a cutting board. Season the steaks with salt and pepper and then cover the entire surface with sesame seeds. Use a paper towel to apply firm pressure to the sesame seeds to get them nice and stuck to the tofu. Fry the steaks sesame-side down for 3-4 minutes or until golden brown and crispy. Flip and continue frying for another 2-3 minutes. Remove from the oil onto paper towels to remove any excess oil and finish with a sprinkle of salt. (NOTE: anytime you are frying something it’s always important to salt immediately after frying.)

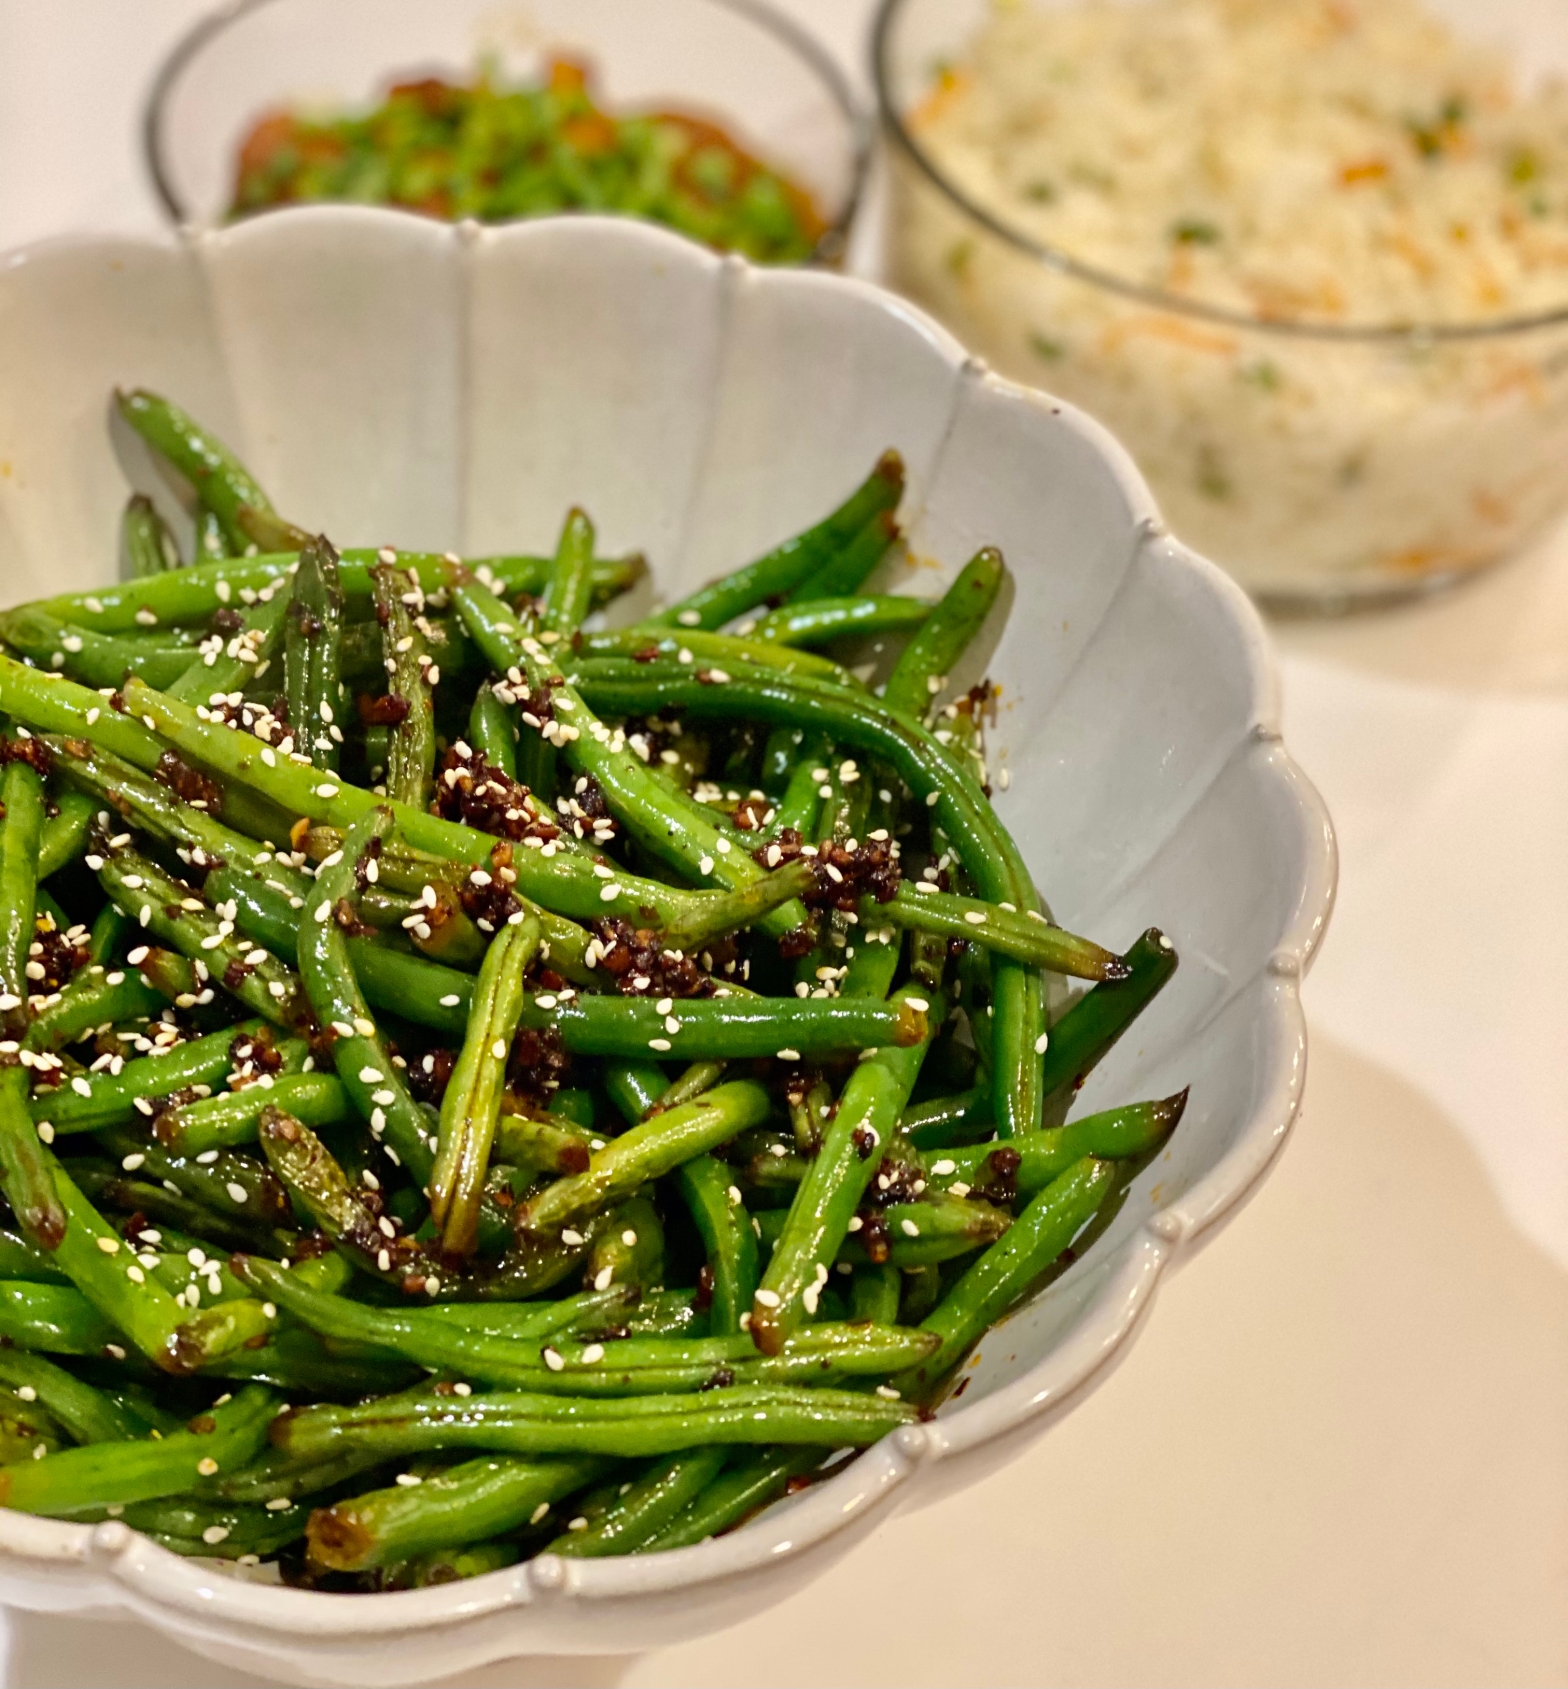
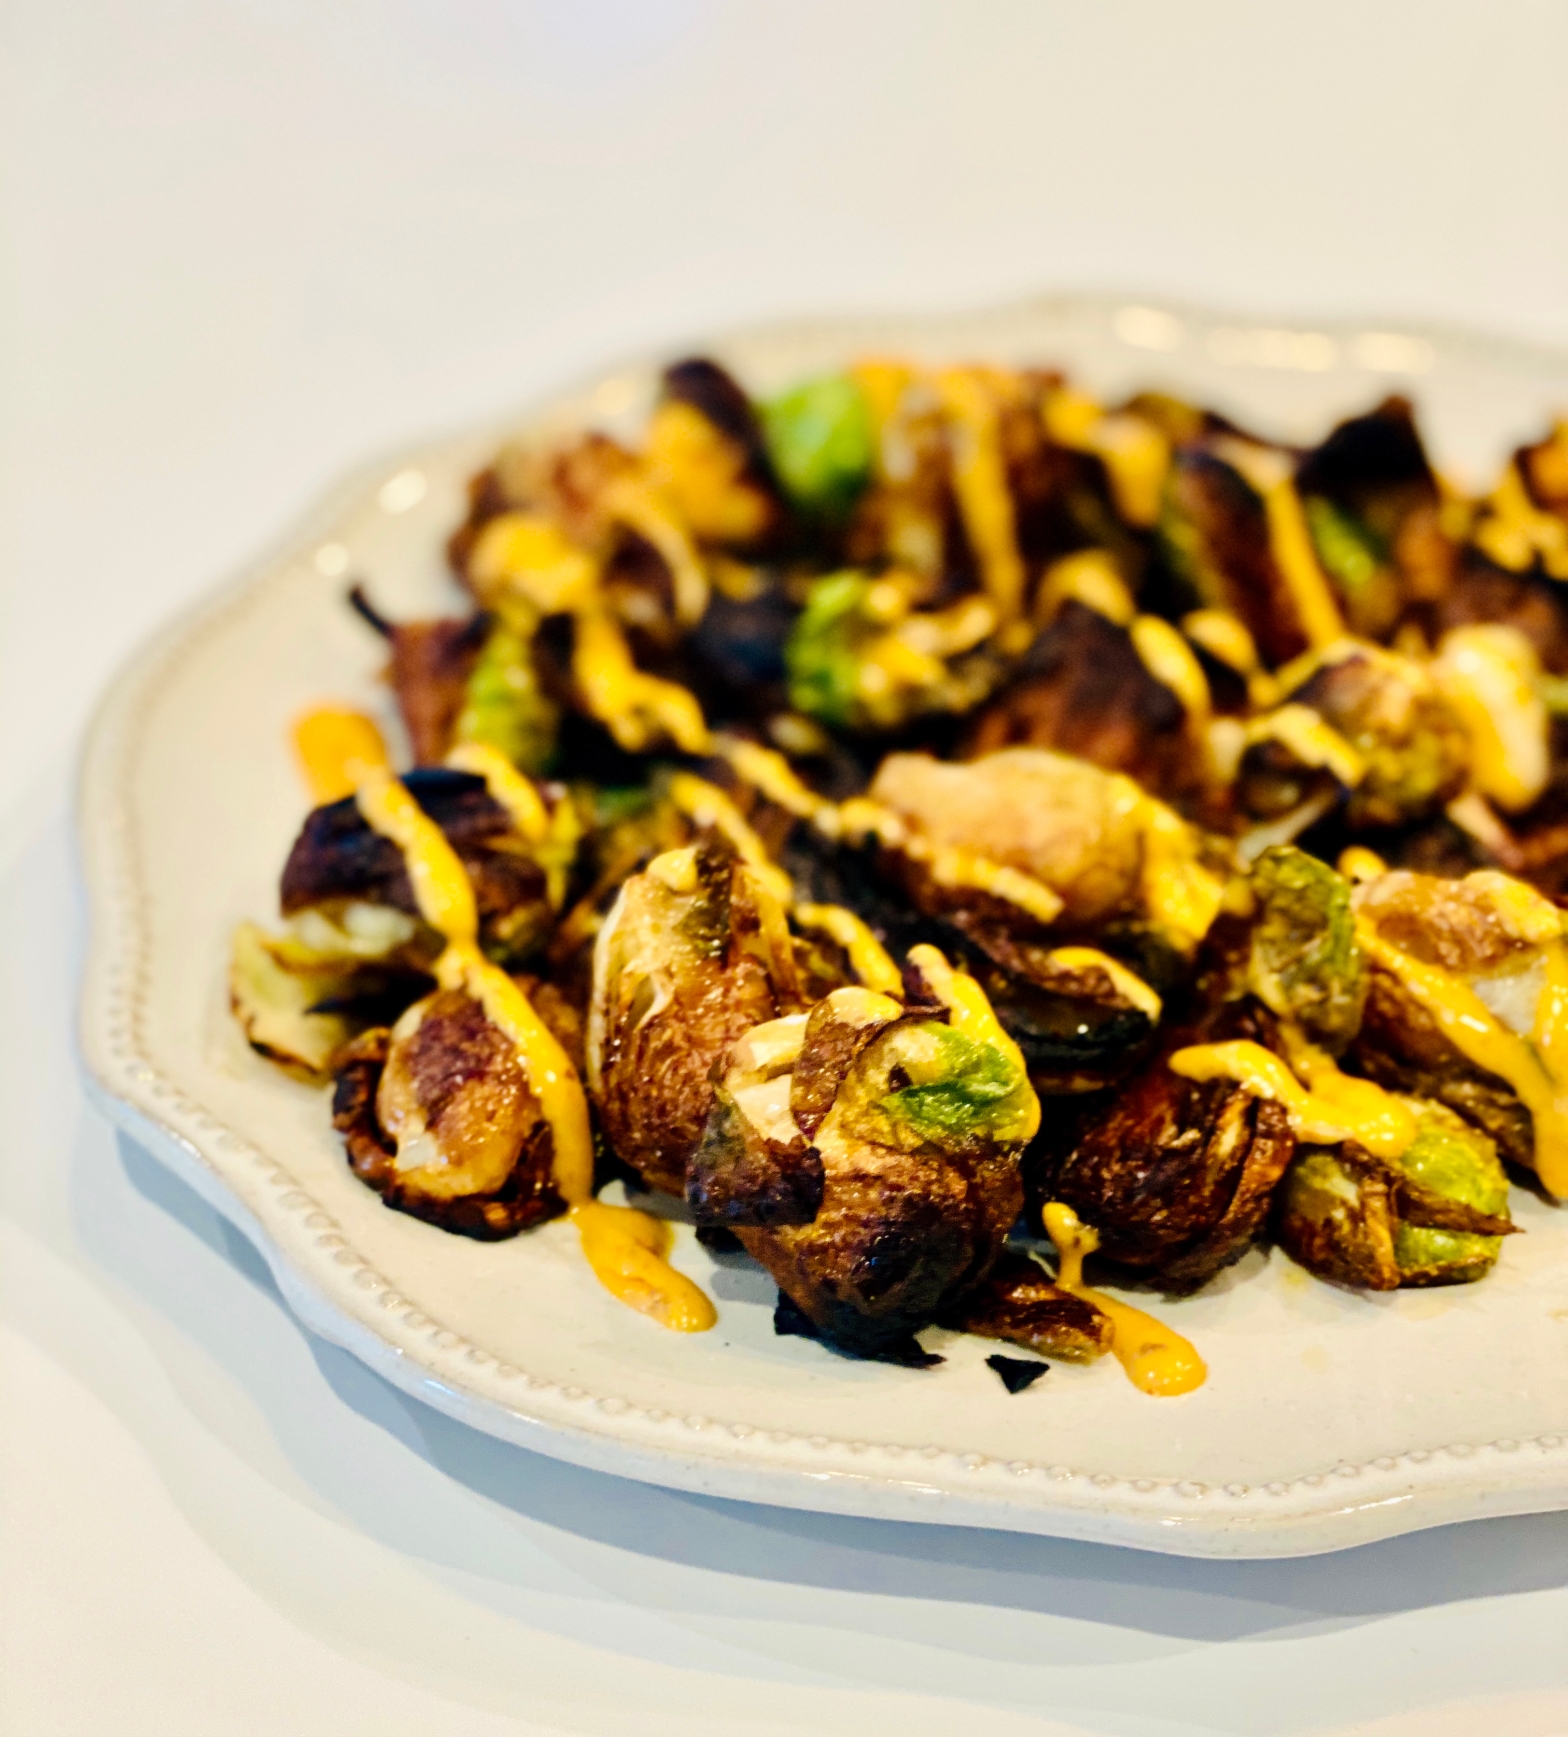
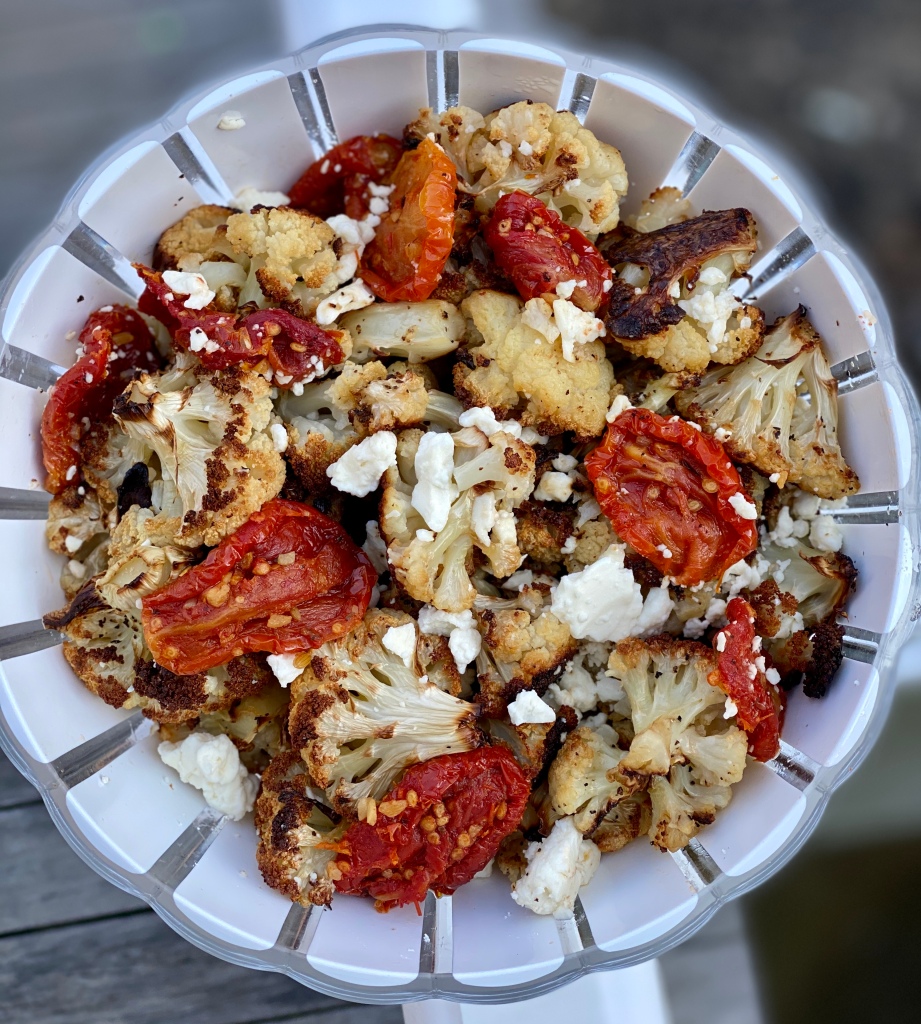
Serve your hot, sesame-crusted tofu steaks with your new favorite dipping sauce. Looking to round out the meal? Grab a bag of Brussels sprouts, slice off the stems, remove any dirty leaves, and slice in half. Fry the halved Brussels sprouts in the same oil as your tofu until blistered and delicious and again, sprinkle with salt before serving. The fried Brussels sprouts will go perfectly with the sweet and sour sauce as well.

Featured

Butternut Squash Ravioli with Bacon Brown Butter

Apple picking. Cozy sweaters. Bronzed leaves. There is so much about the beginning of Fall that I love (besides from my birthday), but just as some people anticipate that first Pumpkin-Spiced Latte, I crave that first fall stuffed pasta. My Italian butcher has a great selection of homemade raviolis, but trust me, any store-bought ravioli stuffed with pumpkin or butternut squash will be perfect. It’s all about the bacon, baby.

SHOPPING LIST: 2 packages butternut squash (or pumpkin) ravioli, 1 package bacon, butter, apple cider vinegar, olive oil, salt, pepper

In order to keep this a one-pot wonder, fill a large saucepan with water and set over high heat. Heavily salt your water and when the water comes to a boil, allow your raviolis to cook about 3-4 minutes (or until fork tender). Before straining the raviolis, reserve 1/2 cup of pasta water. After you strain the ravioli, toss them with a generous amount of olive oil to prevent the raviolis from sticking to one another. Dry your saucepan and get set for step 2.

Slice up the entire package of bacon, add the chopped bacon to your large saucepan and place over medium-high heat. Once the bacon begins to brown, use a wooden spoon to break up the bacon bits. Once the bacon is browned, add 3 tB. of butter. After the butter melts, it will begin to sizzle. We are looking for the “beurre noisette” stage here – where the butter is browned and takes on a hazelnut flavor. Once you notice the small browned bits of butter, add the 1/2 cup of reserved pasta water and 2 tB. of apple cider vinegar and allow the bacon-butter sauce to simmer and thicken a bit. Taste and season with salt and pepper. Re-add your raviolis and allow the raviolis to finish cooking in the sauce, about another 2 minutes.

Use a slotted spoon to remove the raviolis onto your platter. Finish by pouring the leftover sauce and bacon bits directly over the ravioli. If you really want to go crazy, finish with freshly grated parmesan and a drizzle of honey.

Featured

Grandma Lila’s Spinach Squares

Growing up, it was a good night when Mom put a Stouffer’s Spinach Soufflé in the toaster oven. My husband was a bit luckier, as his Grandma Lila made her own, homemade Spinach Squares – a dish that became a staple amongst his family dinners. After getting married, and having to start splitting holidays between our families, I wanted to marry some of his traditions with my own, and thus I re-imagined Grandma Lila’s Spinach Squares so that they would always be a part of our celebrations no matter who we were celebrating with. Casseroles are always a wonderful way of serving side dishes when hosting larger dinners, and these cheesy Spinach Squares are such an awesome way to get everyone loving their vegetables!

SHOPPING LIST: 4 large bags frozen spinach, 2 eggs, whipped cream cheese, dijon mustard, shredded mozzarella, shredded cheddar, parmesan cheese, chopped garlic, non-stick spray, onion powder, salt, pepper

Like most of my casserole recipes, the first thing we are going to do is spray our entire 9×12 glass casserole dish with non-stick spray (or wipe with olive oil) and get that into your oven which needs to be pre-heated to 375 degrees. This is my favorite trick so that the bottoms and sides of our casserole are as crispy as the top.

The main thing we need to do to prep our casserole is to thaw our frozen spinach. I simply add all of the frozen spinach into a large stock pot and turn the heat to medium-high. Once the spinach starts melting, I like to stir regularly with a wooden spoon until all of the ice has thawed. Your spinach is going to VERY watery. Line a strainer with paper towels, and then you are going to strain your spinach onto your paper-lined-strainer. Top with a few more layers of paper towels and use the palm of your hand to gently press down on the spinach until most of the liquid has been squeezed out. NOTE: You will not get ALL of the liquid out of the spinach and that is OK. When you are done, peel off the top layer of paper towel.

In a mixing bowl, crack 2 eggs and give a quick whisk with a fork. Add 2 heaping tablespoons of chopped garlic, 2 tB. of dijon mustard, 2 tB. of onion powder, 1 tB. of salt and 1 tB. of pepper and mix well. Pour the thawed spinach over the egg mixture and add 1 16oz. container of whipped cream cheese, 1/2 cup of parmesan cheese and 1/2 cup of shredded cheddar and 1/2 cup of shredded mozzarella. Mix well. When the mixture is fully incorporated, get an oven mit and carefully remove your HOT casserole dish from the oven. Pour your spinach mixture into the casserole dish and use the back of your wooden spoon to evenly spread the spinach casserole throughout your dish. Finish with another 1/2 cup of shredded cheddar and 1/2 cup of shredded mozzarella evenly tossed over the top of the casserole.

Bake your Spinach Squares for 45 minutes. When they are done baking, cover with tin foil and allow at least 10 minutes for them to cool so they can retain their form when serving.

Featured

Pancetta Penna ala Vodka

Everyone’s favorite Penne ala Vodka is very easily made using a store-bought vodka, which if you read my site religiously (A. Thank You and B.), you know I’m totally a fan of taking shortcuts. BUT, and I mean this seriously, BUT there is a HUGE different between a fresh batch of vodka sauce and your store-bought variety. Test it out and see for yourself. Obviously, the 1/2 lb. of pancetta helps make this dish extra extra special.

SHOPPING LIST: 1 lb. penne, 1/2 lb. pancetta (preferably diced), white onion, garlic, tomato paste, vodka, heavy cream, butter, olive oil, salt, pepper

As always, let’s make sure our pasta is properly cooked al dente to begin. Bring a large pot of water to boil, heavily salt your water once it begins to simmer, and then cook your pasta about 7-8 minutes until semi-soft and al dente. The best trick in the pasta game is to ALWAYS finish cooking your pasta in the sauce. That’s how your pasta will really absorb all the flavors of the sauce as opposed to just being coated in the sauce. Before you strain your penne, reserve 1/2 cup of your heavily salted pasta water. After you strain your penne, douse it with olive oil and give it a nice toss so that you penne doesn’t stick together.

Before we begin our sauce, we need to prep our pancetta, onion and garlic. When you do your shopping, look out for the DICED pancetta, 2 packages of which will equal 8 oz. or 1/2lb. If you have to go to a butcher for your pancetta, just ask for 1/2 lb. and you can always dice it at home. Next, you are going to FINELY dice 1/4 of a white onion and about 6 cloves of garlic. If you are using pre-chopped garlic, you’ll add 2 tB. when we get there.

To get started we are going to add all of the diced pancetta into a large saucepan with high sides and get that going over medium-high heat. We always start bacon and cured meat in a COLD pan because after about 5 minutes or so, your pancetta will start to crisp and release it’s natural fats in which it will cook. Give the pancetta a good mix with your wooden spoon, add 2 tB. of butter, and then add your diced onion and finely minced garlic (or pre-chopped garlic) to the simmering pancetta. Let the pancetta and vegetables cook another 5 minutes until the onions are translucent, then add an entire tube of tomato paste and use your spoon to really mix the tomato paste in. Once you see the tomato paste starting to simmer you are going to add 3/4 cup of VODKA…

NOW THIS IS THE OPTIONAL PART (if you are using a gas stove-top) — after you add your vodka, you can slightly tilt your pan so that the vodka will catch FIRE! DON’T WORRY! This is actually the proper way to make Penna ala Vodka and the fire REALLY helps cook out the alcohol. If you DO NOT want to burn your house down (kidding!), use a wooden spoon to incorporate the vodka into the tomato paste, pancetta and vegetable mix and allow it to simmer for 5 minutes.

Finally, you are going to add 1 cup of heavy cream and the 1/2 cup of the pasta liquid that you reserved earlier. The natural starches from the pasta liquid are really going to help thicken your sauce. Allow the sauce to again come to a simmer and then it’s time to season. A generous pinch of salt and pepper and a dash of red pepper flakes depending your liking. Taste with the back of your spoon and add more salt, pepper or red pepper to your liking. Re-add your olive oil-tossed penne into your large saucepan and mix well with the wooden spoon, allowing the pasta to finish cooking in the sauce for about 3 minutes.

Note to self: plate and eat immediately. The piping hot sauce, the crispy pancetta, the flecks of fiery pepper flakes – this is just one of those dishes you just want to DIVE in.

Featured

Blue Cheese Brussels Sprouts Salad

Our first Shaved Brussels Sprouts Salad took time (I mean, we blanched the Brussels sprouts, after all) but this simpler approach is almost like the winterized ying to the first salad’s bright, summery yang. WHY? Chunks of blue cheese. Toasted Macadamia Nuts. This is the Brussels sprouts salad for when it’s cold out and your body is just CRAVING some greens amidst the cookies and carbonara.

SHOPPING LIST: 1 lb. Brussels sprouts, 1 cup blue cheese chunks, 1/2 cup macadamia nuts, 1/2 cup dried cranberries, 1 lemon, dijon mustard, stone ground mustard, apple cider vinegar, olive oil, salt, pepper

There’s two real steps here: 1. the dressing and 2. shredding the Brussels sprouts. Apparently for the latter you can actually use a food processor so feel free to give that a whirl – I’m old school so I like to spend the time slicing – it’s oddly cathartic. Trim the ends and dirty leaves off of your Brussels sprouts and then begin slicing very THINLY. When you get 1/2 way through, turn the Brussels sprout onto its newly created flat edge and continue slicing thinly through the remainder. Pile all your shredded veg into your serving bowl and the hard work is behind you!

Next, let’s get our simple dressing out of the way. In a small bowl, squeeze the juice of one lemon. Add 3 tB. of stone ground mustard, 3 tB. if apple cider vinegar, 3 tB. of olive oil and a hefty pinch of salt and pepper. Because the Brussels sprouts are dense and cruciferous, a salad like this can hold up to an ample amount of dressing. Give the dressing a quick mix and set aside.

Heat a small saucepan and give your 1/2 cup of hazelnuts a quick toasting. Once the perimeter of the nuts starts to brown, spread them out on a cutting board and give them a quick, rough chop. Top your shaved Brussels sprouts with 1 cup of crumbled blue cheese, 1/2 cup of dried cranberries (or cherries) and then the 1/2 cup of chopped hazelnuts (toasted or otherwise). Give your dressing another good mixing to make sure it emulsifies and then drizzle the dressing over your entire salad and give it a liberal toss so that all of the ingredients are evenly coated.

While this recipe is vegetarian – if you are looking to make this side dish more of a main event – my FAVORITE thing to do is to add crispy bacon. IF you decide to go that route, make sure to retains some of that bacon grease and replace 1 tB. of olive oil with 1 tB. of bacon grease for incredible bacon dressing!

Featured

BASIC Lasagna

There’s a time and a place for everything, right? And sometimes we just don’t have time to make a béchamel and go crazy with our homemade lasagna – but that doesn’t mean it won’t be delicious. Here’s my simple tricks for the BEST basic lasagna.

SHOPPING LIST: 2 boxes of lasagna noodles, 1 32 oz. ricotta cheese, 1 jar pesto sauce, 2 jars tomato sauce, 1 egg, parmesan cheese, shredded mozzarella, garlic salt

Quick chat about the noodles. I happen to love the No-Boil lasagna noodles because they are SUPER thin and well, duh, you don’t have to pre-cook them BUT if you are into the ruffle edges, you just need to par-cook your lasagna noodles in heavily salted boiling water until they are pliable and super al dente (about 4-5 minutes). Make sure you toss these lasagna noodles in olive oil after straining to make sure your noodles don’t stick together! Whether you have firm no-boil lasagna sheets or semi-cooked pasta, you’ll proceed the same way moving forward.

There’s really only one more step before we begin building our lasagna. In a large bowl, crack 1 egg and mix with a fork. Then, empty the entire contents of your ricotta cheese and pesto sauce into the same bowl. Add 1 tsp. of garlic salt and MIX well. This is the hack here – adding the pesto to the ricotta cheese flavors your cheese layer because honestly, ricotta cheese is actually pretty bland and needs a little sprucing up.

Preheat your oven to 375 degrees. Now, take your glass baking dish and using the back of a spoon, spread a thin layer of tomato sauce on the bottom of your baking dish. ALWAYS start your lasagna with a thin layer of tomato sauce. Next, begin with your first layer of noodles. I typically end up with 3 sheets of pasta going horizontally (so the shorter direction of your rectangular dish). Next, about 5-6 dollop of the ricotta cheese mixture, again using the back of your spoon to gently spread the ricotta. Top the ricotta with a thin layer of tomato sauce, a general sprinkle of parmesan cheese and then another 3 sheets of pasta. After I add each sheet of pasta I like to gently press down on the noodles to really “squish” (for lack of a better word) the previous layers to really makes sure that the edges and corners are taken care of. Continue this process until you are at the top of your baking dish – or run out of noodles. After your lay the top layer of pasta down, finish with a TON of tomato sauce (I like my lasagna to cook almost in a pool of tomato sauce so again, the edges are soft and cooked through) followed by a generous covering of shredded mozzarella and a sprinkle of garlic salt.

Cover your baking dish with tin foil and bake your covered lasagna in the oven for 30 minutes. Un-cover your lasagna, raise the heat to 400 degrees and continue baking 10-15 minutes or until the top of your lasagna is blistered and bubbling. NOW! PAY ATTENTION!!!! Do NOT serve the lasagna immediately or it will fall apart. The lasagna needs to settle – kind of like how a steak needs to rest after being cooked. Re-cover your lasagna and allow it cool for 5-10 minutes before slicing. This goes without saying – but honestly, leftover lasagna reheated the following day is ALMOST better than the first go around for me.

Featured

Grilled Cauliflower Steaks with Tahini

Usually when we think of grilling we think of quick and easy. Grilling cauliflower steaks does NOT fall into the category of a quick fix, but roasting cauliflower in a conventional oven takes some time too. Whenever you chose to use this type of recipe, get your cauliflower started a good 15-20 minutes before you start grilling the rest of the components of your lunch and dinner so that everything is ready at the same time.

SHOPPING LIST: 2 heads cauliflower, grapeseed oil, adobo seasoning, tahini, sesame seeds

First things first, get your BBQ turned on so that when you’re done prepping the cauliflower the grill is hot and ready for immediate cooking. Using a large kitchen knife, remove the bottom core and leaves from your head of cauliflower. Turn the head on it’s side, and make thick cut slices – about 1 to 1.5 inches thick – until each head of cauliflower has transformed into 3-4 steaks per head. Lay out your cauliflower steaks on a sheet pan and use a pastry brush to generously brush each steak with grapeseed oil and then generously season with your of adobo. Flips the “steaks” over and repeat on both sides.

Now you are ready to throw the cauliflower steaks on the grill. The steaks will take a MINIMUM of 10 minutes per side. You want to make sure that the underside of the your steak is evenly charred before flipping. Because the steaks have a large surface area, I find myself moving them around on the BBQ to make sure they are evenly seared. After you flip your cauliflower, use the center core to determine when the cauliflower is cooked through. If your metal BBQ spatula can easily slice through the core, the cauliflower is done! NOTE: when in doubt, keep the cauliflower on the BBQ!!! Undercooking the cauliflower is MUCH more obvious than extra time on the BBQ.

The best part of this recipe is the SIMPLE finish that truly elevates this dish from simple to special 🙂 Drizzle the grilled cauliflower steaks with your favorite tahini and finish with a sprinkle of sesame seeds.

Featured

Grilled Lobster Tails

Grilling lobster SOUNDS simple – just throw the tails on the BBQ like you would do a shell-on shrimp but, no! When heated, the lobster tails actually curl up and because the shells are so thick it takes a while for the meat to actually cook through, and then you have the arduous task of removing the cooked flesh from the smoking hot shells. Thankfully for you, I’ve figured out the best way to grill lobster tails and it’s a simple, albiet, 3-step process.

SHOPPING LIST: lobster tails (recommended 2 per person), butter, old bay seasoning, sweet chili sauce, lemon, salt

STEP 1: Par-Boil the Lobster

Fill your largest pot with water and set over high heat. Slice the lemon in half and squeeze the juice of both halves into the pot of water and add the squeezed lemons into hot water. Add about 1/2 cup of salt so your water is heavily seasoned as well. When your water comes to a boil, add your lobster tails and boil for 5-6 minutes. This will firm up the flesh inside the shell. Keep a strainer with ice waiting in your sink and immediately flash your lobster tails under cold water and mix with the ice to prevent the tails over-cooking. As mentioned, you’ll see below how the lobster tails CURL up from the heat – but no worries!

STEP 2: Slice and Season the Lobster

Using your strongest kitchen knife, stretch your lobster out and lay them flat on their backs on a cutting board so you can slice directly through the entire shell. Melt a few tB. of butter in the microwave and use a pastry brush to brush each half with a bit of butter. Season with Old Bay seasoning, or you could always just use salt and pepper. I personally like layering the flavors of the Old Bay with the Sweet Chili Sauce – it’s one of those combinations that might sound off but pair really well together with the sweet, buttery shellfish.

STEP 3: Grill the Lobster

For all intents and purposes, the lobster is BASICALLY cooked at this point, but we still want the smokey, charred flavor from the BBQ. So fire up your BBQ and then lay the lobster tails, flesh-side-down, and let them soak up all that delicious grill flavor for 2-3 minutes. Remove the lobster tails from the BBQ, spread them nicely on your platter, and finish with a drizzle of Sweet Chili Sauce. If the sauce isn’t your thing, a fresh squeeze of lemon is always a good idea.

Featured

Chili Lime Peach Guacamole

Moves to Florida, makes guacamole. Sounds pretty basic, huh? Obviously we try our best to be anything BUT basic around here, nothing a beautiful Florida peach and Tajin seasoning can’t fix.

SHOPPING LIST: 3 avocados, 1 tomato, 1 peach, 1 red onion, 1 jalapeño pepper, 1 lime, salt, pepper, tajin seasoning

Most important thing when making guacamole is making sure your guacamoles are perfectly soft! The second most important thing is prepping your lime first, so that your avocado can be placed directly into the citrus to prevent it from browning. We want a BRIGHT green guacamole!

Using a microplane, zest the entire lime into a small bowl. Then squeeze the entire lime over the zest. Next up, slice your SOFT avocados in half, remove the core, and squeeze the avocados directly over the lime. (If you cannot squeeze your avocados out of the shell they DEFINITELY are not soft enough for guacamole). Use a fork to smash the avocado into the lime juice.

Now for the chopping, slice your entire peach around the pit, give the slices a rough chop and add the peaches to the mashed avocado. Next, remove the core of your tomato and give your tomato a rough chop as well. I like the pieces of tomato and peaches to be a nice, larger chop. However, for the jalapeño and 1/4 of your red onion, you need to DICE these components, so a very fine chop for the onion and jalapeño. I like to use the entire jalapeño because I prefer my guacamole super spicy but feel free to scale down here based on your preference. Finally, a generous pinch of salt and pepper and 1/2 tsp. of the tajin seasoning and then use that fork again to really mix up all of your ingredients. After plating your guacamole, finish with a final sprinkle of tajin on top!

Featured

Honey Mustard Chicken Salad

I first put this on my Instagram as the “be nice to people or else they’ll make their own Honey Mustard Chicken salad” but the point is that I am re-creating this dish that I have been over-spending on for YEARS. And now you I’m letting you in on my secret.

SHOPPING LIST: 1 rotisserie chicken, 6 stalks celery (with leaves), 1 jalapeño, Honeycup mustard, mayonnaise, apple cider vinegar, onion powder, salt, pepper

Let’s be real, a supermarket rotisserie chicken is really one of life’s simple pleasures. It also makes no sense that somehow the organic rotisserie chicken is CHEAPER than a whole uncooked chicken so if anyone could help explain that I’m all ears. Anyways, for the purpose of this chicken salad, I like to remove the breasts, take off the skin and then rough chop the white meat. Like I say all the time, THIS IS YOUR DISH, so if you want to go dark meat for this bad boy, do you.

Next, slice up 6-8 stalks of celery. This chicken salad is CELERY HEAVY! Almost equal parts celery to chicken. I like to include the celery leaves in this chicken salad really because it looks pretty. Finally, because if you follow this site you know we are spice-aholics in my house, thinly slice 1 OPTIONAL jalapeño and add it to your chopped chicken and celery. Top the mixture with 1 tsp. of onion powder.

For the dressing, you NEED Honeycup mustard – you know that SUPER THICK honey mustard with a caramel color. In a small bowl, combine 2 tB. of your Honeycup mustard with 1 tB. of mayonnaise, 2 tB. of apple cider vinegar and a pinch of both salt and pepper. Use a fork to mix well and then drizzle all of the dressing over your chicken salad components and toss the chicken salad until it’s evenly coated with the dressing.

Featured

Sautéed Sichuan String Beans

If you are like me, I feel like 90% of my purchases come from targeted Instagram ads at this point. My favorite thus far being the Sichuan Chili Crisp from FLY BY JING (although I haven’t tried the Momofuku version yet) . I could go on for days how often I use this sauce now, but for the sake of brevity, let’s focus on today’s recipe. Sautéed String Beans are ALWAYS on our Chinese food order, and this is undoubtedly the simplest way to re-create this salty, spicy speciality.

SHOPPING LIST: 1 lb. string beans (snipped ends), Chili Crisp, grapeseed oil, chopped garlic, soy sauce, salt, pepper

Let’s make sure of two things before we begin. Make sure the ends of your string beans are cleaned and that whatever pan you are using has a LID. The key to the perfect string bean is a combination of searing and steaming.

In a bowl, top the clean green beans with 3 heaping tB. of Chili Crisp. Use your hands to really get in and massage the string beans. In a saucepan, get about 1/4 cup of grapeseed oil going over medium high heat. Add 2 tB. of chopped garlic and when your garlic starts to get golden, add all of the green beans, using a spatula to get all of the chili crisp out of the bowl. Once you spread the green beans out in your pan, give them a few minutes to really sit and sear against the pan. Season with salt and pepper and give them another quick toss, again letting the green beans sear for a few more minutes un-interrupted.

Now for the steaming, have your lid ready and add 1/2 cup of soy sauce and quickly cover the pan. Reduce the heat to medium low and allow the string beans to finish cooking the steam for another 7 or so minutes or until the string beans are fork tender.

Finish with a sprinkle of sesame seeds. If you prefer your string beans even spicier, you can always add an extra drizzle of Chili Crisp on top.

Featured

Roasted Garlic Rack of Lamb

I am so excited about this. I love LAMB CHOPS. Definitely a go-to order for me when I’m out to a nice dinner – and yet, not something I often make at home. Dare I say lamb chops can be intimidating? So when my Father-in-Law showed up with four gorgeously Frenched (ie. trimmed) racks, it was time to put my anxiety aside. Do I slice and grill them individually? Do I roast the entire racks? Do I serve single or double chops? The point is – there are A LOT of ways of doing this – and you just gotta make a decision. So for the sake of brevity, and cooking a LOT of chops with ease, here is a simple recipe to perfectly roast your racks of lamb.

SHOPPING LIST: 2-4 racks of lamb (preferably Frenched), olive oil, garlic, dijon mustard, lime, salt, pepper (SAUCE: sour cream, lime, chopped garlic, scallions, parsley, onion powder)

The first step is going to make our simple garlic marinade. In a food processor, combine 1/2 cup of olive oil with 3 tB. chopped garlic (or 10 cloves of whole garlic), the juice and zest of one lime, 2 tB. of dijon mustard and a pinch of salt and pepper. Pulse the mixture in your food processor until it’s well mixed and all of the garlic is pureed. The mixture will look very similar to a salad dressing (and could be used as such). Also, feel free to have some liberty here – add dried rosemary if you want a more herbaceous marinade, or sub the lime juice for red wine vinegar.

Remove your lamb chops from the packaging and make sure they are patted dry. GENEROUSLY sprinkle salt and pepper onto both sides of your lamb chops, giving them a nice rub to ensure that the seasoning sticks. Next, lay a rack over your baking sheet and display your racks of lamb fat-side up (so the arch of the rib bone is facing DOWN). Smother the tops of each rack in your garlic marinade and allow the marinade to sit for a minimum 1 hour.

When you’re ready, pre-heat your oven to 450 degrees. Roast the racks for 14 minutes. Remove from the oven, use tongs on the actual rib bones to flip the racks and finish roasting for 8 more minutes. Remove the lamb from the oven, flip them back over onto a wooden cutting board so the fleshier side is facing upward and cover with tin foil. Allow the chops to rest for a MINIMUM of 15 minutes.

In the meantime, if you want to make an easy accompaniment, this is what we whipped up in my house: In a small bowl, mix 3/4 cup of sour cream, 1 tB. chopped garlic, the zest and juice of one lime, 2 tB. chopped chives, 1 tB. chopped parsley and 1 tsp. onion powder. Mix well and season with salt and pepper to taste.

When all of the juices have settled into your lamb chops, you can begin to slice them. I chose to do single chops as I was serving them on a large platter but if I was plating the chops for a dinner party I would have preferred double-chops style. The key here is to rotate the chops upwards so the bones are perpendicular to the board, this way you can slice laterally downward through the flesh ensuring that each chop is directly sliced between each bone. I like to finish mine with a very simple sprinkle of sea salt before serving and serve with an extra EMPTY bowl for people to dispose of their lamb bones.
Download
Featured

Sunday Morning Frittata

I love hosting. But sometimes on a weekend morning, after a few too many glasses of wine, it’s not so easy to throw together something fabulous. This is where the Sunday Morning Frittata literally saves the day!!! I’m going to give you the exact recipe for the last one I made (pictured above), but let’s understand something I am always trying to convey — USE WHAT YOU GOT!!!! (or what you like)! The frittata is a simple base for any combination of eggs, cheese and vegetables — and is PARTICULARLY delicious when you start with some fried bacon, ham or any type of breakfast meat 🙂 But let’s walk before we run with this beautiful vegetarian variation.

SHOPPING LIST: 10 eggs, white onion, frozen spinach, 2 tomatoes, milk, pesto sauce, olive oil, butter, garlic salt, pepper, shredded mozzarella, grated parmesan cheese

Preheat your oven to 400 degrees. The key to the perfect frittata is non-stick pan or skillet. I have been particularly loving my Zakarian Nonstick Cast Iron Skillet. Heat your skillet over medium heat and then add 2 tB. of olive oil and 2 tB. of butter. In the meantime, slice your white onion in half through the core, and then slice along the grain so you have a large pile of thinly sliced onions to add to your olive oil and melted butter. (In French cooking school, they teach you how to make French Onion Soup – shocking, I know. What I learned from this was 2-part. 1. They always used a blend of olive oil and butter for this purpose and 2. Never go above medium heat. The point is for your onions to slowly caramelize, not burn.) The key to the frittata being excellent is that the vegetables or ingredients that you incorporate within it are properly cooked, and as always, well-seasoned.

Short story: be patient with your onions. When they begin to become translucent, give them a quick season with some garlic salt and black pepper. When they are fully caramelized, you can add 1 cup of frozen spinach. **The only reason I used frozen spinach here is because I had it leftover from the Pancetta-Stuffed Mushrooms recipe** While your spinach is beginning to defrost in the pan, crack 10 eggs into a large bowl. Add 1/4 cup of milk, a hefty pinch of salt, a pinch of pepper and mix well. Next, add 2 cups of shredded mozzarella. (Sometimes I love using cubed FRESH mozzarella instead, or crumbled feta. You could go totally Greek with your frittata, switch it to a red onion, add some dried oregano and kalamata olives with your feta cheese. Once the spinach is nice and wilted into your caramelized onions, add 2 tB. of pesto (any brand of your choice) and really let that pesto melt and get incorporated into your vegetables. Now, increase your skillet to medium-high heat and pour the scrambled egg and cheese mixture directly over the vegetables.

Give the eggs and vegetables a QUICK mix so that the eggs can migrate to the bottom of the skillet and then LEAVE the skillet UN-TOUCHED for 5 minutes over the medium-high heat. Turn back to your cutting board and thinly slice your tomatoes. Lay the slices of tomato over the top of your frittata (I think I fit about 6-7 slices on mine!) and then cover the entire surface with your grated parmesan cheese. Finish with an extra sprinkle of salt and pepper and then pop the skillet into your 400 degree oven for 15 minutes. My favorite part — get a beautiful trivet and present your piping hot frittata directly in the skillet in which it was cooked and a beautiful cake knife for slicing.

Featured

Pancetta Stuffed Mushrooms

If the plate is any indication, I whipped up these bad boys to bring to my friend’s Christmas party. I offered to bake a cake for her daughter’s birthday but somehow I got tasked with making her favorite, stuffed mushrooms, as well. Good thing since the cake was a DISASTER (I never said I was a baker). Feel free to omit the pork if that’s not your thing.

SHOPPING LIST: 3 packages button mushrooms (for stuffing), prosciutto, white onion, chopped garlic, frozen spinach (defrosted), 1 egg, thyme, cream cheese, shredded mozzarella, parmesan cheese, olive oil, butter, truffle oil, garlic salt, pepper

Preheat your oven to 400 and then let’s start with the mushrooms – WHICH YOU NEVER WANT TO WASH – so remove the stems, reserve the stems, and then clean your mushrooms with a damp paper towel. Mushrooms are way too absorbent for a rinse in the sink. Once you get your mushrooms prepped, lay them backside-up on your sheet tray, and use a pastry brush to brush olive oil onto the backs of your mushrooms and then season with salt and paper. Flip your mushrooms over and repeat the process so your mushrooms are prepped and seasoned and ready to go! Chop your stems very finely and reserve.

Take 1/2 of your white onion and give it a really nice, fine dice. Because this is a stuffing you really want to make sure your ingredients are all small and uniform so one item doesn’t stand out more than another. Chop an entire package of pancetta into small pieces. Add 1 tB. of olive oil to your saucepan and then fry your chopped pancetta over medium-high heat. When your pancetta is browned and crisp, add 1/4 cup of butter and add 2 tB. of chopped garlic, the diced onion, 2 tB. of chopped thyme. Allow the onions to become translucent and then add 1 cup of your diced mushrooms stems. Once your mushrooms begin to soften, season with garlic salt and pepper. While your mushroom mixture is cooking, take 1 cup of your pre-thawed frozen spinach and give it a rough chop. Add the spinach to the mushrooms and again, season lightly with garlic salt and pepper. When all the liquid is gone from your pan and your vegetables look nice and caramelized, empty your pan into a mixing bowl.

In a cup, mix up one egg with garlic salt and pepper. When I am adding an egg to a dish like this I like to make sure that my egg is seasoned as well – it’s just another way to ensure that your dish is flavorful throughout. Add the seasoned egg to your mixing bowl along with 12 oz. of cream cheese and 1 cup of shredded mozzarella. Mix very well and then you can begin stuffing your mushrooms. I like to use the small soup spoons from my everyday kitchen utensils to do this. I also like to add enough stuffing to each mushroom so they are really piled high and ALMOST over-flowing like the photo above. Once all of your mushrooms are stuffed, I like to give a final drizzle of truffle oil and then top each mushrooms with a generous MEGA-pinch of parmesan cheese. 15 minutes in your 400 degree oven and these stuffed mushrooms are ready for the party!

Featured

Lemon + Thyme Shrimp Scampi

This is like one of those dishes where you go to the store specifically for seafood because you want a light dinner but it’s still freezing outside so you want something warm and satisfying and trust me, nothings HITS like a perfectly buttery shrimp scampi. Serve on its own or over a bowl of your favorite pasta (tossed with olive oil and salt, of course), this will take you less than 10 minutes start to finish and that HITS in a whole different way for us procrastinators.

Before I begin, this is SHRIMP SCAMPI people – if you are averse to butter, maybe you should try the Grilled Shrimp + Haloumi Skewers or the Bacon-Wrapped Shrimp with Rosemary Apricot Glaze. Now for the rest of my butter-loving fans, let’s begin.

SHOPPNG LIST: 3 lbs. jumbo shrimp (peeled and deveined), butter, olive oil, dried onion, Adobo seasoning, chopped garlic, thyme, lemon, garlic salt

Toss your cleaned shrimp with 1/4 cup of olive oil and 2 tB. of Adobo seasoning and mix well. In a saucepan over medium heat, add 1/2 cup of butter and 2 tB. of olive oil. Once the butter has melted, add 2 tB. of chopped garlic and 1/4 cup of dried onion (You’ll find the dried onion flakes in the SPICES section of your market. I like the use here instead of FRESH onion because of the texture it creates for the sauce.) Allow the garlic and onion to sauté in the butter for a few minutes along with a handful of thyme springs. *ANOTHER NOTE: I don’t typically love using full branches of HERBS anywhere in my cooking because I think it’s silly; but in this application, the flavor of the thyme will infuse into your butter sauce and the cooked springs actually make for a beautiful presentation.)

Anyway, now you can add all of your shrimp into the simmering butter and garlic and dried onion and thyme. DO NOT mix your shrimp too often. The key to getting a nice caramelized crust on your shrimp is to let the shrimp really INTERFACE with the bottom of your hot sauté pan. Once you notice the bottom of your shrimps turning pink, then you can give them a nice toss with a wooden spoon. At this point in the cooking time, I like to finish the shrimp with a generous sprinkle of garlic salt, the juice of one lemon and an extra tB. of butter for good luck 🙂 Allow the shrimp to continue cooking in the lemon-y scampi sauce until the shrimps are pink all around and firm to the touch. Serve with a few lemon wedges and those beautifully wilted thyme sprigs for effect.

Featured

Surf + Turf Saganaki

There’s not enough positive things I can say about Cucina + Amore’s Puttanesca. If you are an olive lover, this tomato sauce is simply the best, briniest, olivey-est of THEM ALL. You can easily finish cooking any par-cooked pasta in this salty sauce for a quick dinner, OR, get a little fancy and follow along for this super simple Surf (shrimp) and Turf (bacon) Saganaki.

SHOPPING LIST: 1 jar Cucina + Amore Puttanesca, 5 strips bacon, 1 lb. shrimp (peeled + deveined), 1 can artichokes, chopped garlic, crumbled feta cheese, Adobo seasoning, red pepper flake, dried parsley

Let’s start by saying that if you can’t find my preferred Puttanesca, any similar sauce will do. If you cannot find anything puttanesca-like, just add 1/2 cup of halved Kalamata olives when frying your bacon and artichokes and then use a marinara of your choice.

Give a quick, thick chop to your 5 strips of bacon and get that into a cold sauté pan (make sure said pan HAS A COVER). Turn the heat onto medium-high and let your bacon begin to sizzle away. In the meantime, toss your cleaned shrimp in Adobo seasoning and set aside. Strain your canned artichokes, slice them in half, and dry them thoroughly with paper towels. When your bacon begins to release its fat and become crispy, add 1 tB. of chopped garlic and your halved artichokes and allow the artichokes to fry in the bacon fat. (This is where you would add your own olives per above). When your artichokes are browned and crispy, add the entire jar of puttanesca (about 1.5 cups) and let it come to a simmer. Use a wooden spoon to help deglaze the bottom of the pan and free all the bacon bits into your tomato sauce.

Add your shrimp and give a quick toss so they are coated in the tomato sauce. Sprinkle parsley flakes, red pepper flakes (optional) and 1 cup of crumbled feta on top and then COVER YOUR PAN so the shrimp can steam in the tomato sauce! It will take about 5-7 minutes over low heat for your shrimp to be firm and cooked through – and just like our original Halibut Saganaki recipe – one of the best parts of this style of cooking is you can serve the dish DIRECTLY in the pan in which it was cooked. We love that over here. We also love sneaking bacon into recipes.

This is the sort of dish you definitely want to serve with some sort of starch to soak up all the goodness. A simple pasta, or garlic bread will do, or you can make a quick Garlic Rice: sauté 1 tB. chopped garlic in 2 tB. olive oil, when the garlic browns add 1 cup of rice and 1 tsp. of salt, sauté for 1 minute, add 2 cups of water and bring to a boil, cover and reduce to a simmer for 13 minutes.

Featured

Sheet Pan Sausage + Peppers

BIG sausage and pepper fan over here. Especially when it’s grilling season it’s not only so simple, but then you have a complex meal of protein and vegetables with minimal effort. What’s easier than grilling though? Throwing EVERYTHING on a sheet pan and calling it a day 🙂 Obviously I had to dress it up a little bit, but I promise this will become an easy staple for your family during these dreary winter months.

SHOPPING LIST: 2 lbs. sausage of your choice, 2 packages mini bell peppers, red onion, chopped garlic, crumbled feta cheese, pickled banana peppers, grapeseed oil, Adobo seasoning

Here’s what I have learned about sheet pan dinners: your protein MUST be flush with the bottom of your sheet pan in order for it cook properly! With that said, preheat your oven to 400 degrees trim the ends off of your bell peppers and slice up your red onion and spread them over your sheet pan. Drizzle your veg with grapeseed oil, 2 tB. chopped garlic and a generous amount of Adobo seasoning and mix well. I used about twelve Sweet Italian Chicken Sausages and I just shimmy them in between the vegetables – as mentioned above – to make sure the bottom of the sausages are touching the sheet pan. Finish with a generous handful (or two) of crumbled feta and roasted for 20 minutes.

Remove your sheet pan, flip each sausage over and slice them on the bias. Doing this makes sure that both sides brown evenly, and slicing the sausage at this point releases some of the juices that will soaked up by your veggies. Finish cooking another 10 minutes or until your sausages are firm and cooked through. The FINAL TOUCH?!?! Top your sheet pan Sausage + Peppers with a bunch of pickled banana peppers – the briny peppers are the perfect compliment to the sweet bell peppers and the fatty sausage. That’s all she wrote!

Featured

Chipotle Lime Chicken Fajitas

Sometimes you just need a quick, FLAVORFUL dinner that will satisfy all the senses (AND require minimal clean-up). Fajitas are fajitas – I get it – but like any age old dish there are ways to make it your own. My family LOVES the Frontera Fajita Skillet Sauce with Chipotle and Lime because it really smothers the natural flavors of the peppers, onions and chicken in a smokey yet subtly tart sauce that keeps you coming back for more. My other trick? Spicing up the peppers (literally) by using a mix of bell and HOT peppers.

SHOPPING LIST: 1 lb. boneless/skinless chicken breast, red onion, green bell pepper, red bell pepper, 2 long hots, 1 jalapeño, 1 package Frontera Fajita Skillet Sauce, chopped garlic, olive oil, salt, pepper, tortillas (of choice), sour cream, shredded Mexican cheese or cotija

I like to prep my vegetables first so I only have to dirty one cutting board. Slice up your entire red onion. In you skillet, warm 2 tB. of olive oil over medium high heat. Add 2 tB. of chopped garlic and your sliced red onion and get that going. As always, we like to season along the way, so make sure to season your onion and garlic with salt and pepper. While those are starting to saut̩, slice up your peppers. Cut the ends off each pepper. For the bell peppers, make sure to remove the seeds and trim the white-tish part from the center. Slice your bell peppers linearly, but for your HOT peps Рthe long hots and and the jalape̱o РI like to slice them horizontally WITH the seeds.

Add all of your peppers into the skillet with the onions and garlic and mix well. Allow the peppers to cook about 5 minutes or so. I don’t like my peppers to be TOO soft but if you like a super cooked pepper with no bite then sauté them for double that amount of time. Now that you’ve added your peppers, season again with salt and pepper.

While your peppers are cooking, slice the chicken breasts into strips. (Let’s also quickly reference here that you could use SHRIMP, or TOFU, or STEAK, etc. if your heart desires.) Reserve your cooked peppers and onions in a bowl and then add another 2 tB. of oil to your hot skillet. Add your sliced chicken and give it a minute to brown before moving with your wooden spoon. Once you get a nice sear, give you chicken a toss, then season your chicken with salt and pepper. Let it cook another 2 minutes or so in order to nicely sear another surface of your chicken strips. When your chicken is par-cooked, re-add your sautéed vegetables and top the entire mixture with the full package of your Frontera Fajita Sauce. Turn your heat down to medium-low and allow the chicken to finish cooking in the fajita sauce for about 8-10 minutes (your sauce should be simmering the entire time).

THE BEST PART? You get to serve this dish DIRECTLY in the skillet in which you cooked it it in. Love that. I served mine with sour cream, shredded Mexican cheese and homemade tortillas which are not photographed because it was my first time trying this at home and now I understand why I need a tortilla press (Thank you, Amazon!). I’ve got a lifetime supply of Maseca here now so sooner or later we’ll talk fresh tortillas on the blog — or even pupusas — so stay tuned!

Featured

Chinese Cashew Chicken

Last night I did a LIVE cooking demo for my husband’s company, New Frontiers. The first time we did this I demo-ed my favorite, Spaghetti Carbonara. This time we went Asian with it because honestly, there is NO good Chinese food out here in The Hamptons (please please please feel free to correct me if you know something I don’t). The Prince LOVES Chinese so I’ve really been trying to work on my Asian-inspired cooking. Honestly, if you’re craving Chinese flavors, this hits the spot AND won’t make you sick the next day 🙂

SHOPPING LIST: 1 lb. chicken breasts, 1 cup cashews, soy sauce, hoisin sauce, creamy peanut butter, sesame oil, sriracha, rice wine vinegar, salt pepper, grapeseed oil

Dice your chicken or use a kitchen shears to cut your chicken into small 1-inch pieces. In a small bowl, toss your chicken with 1/4 cup of soy sauce. When cooking Asian-style chicken, I always like to toss my proteins in a little soy sauce before cooking because I find the chicken absorbs the flavors much better when it’s raw.

In a small pot, add 1/3 cup of soy sauce, 3 tB. of peanut butter, 2 tB. of hoisin sauce, 2 tB. of sesame oil, 2 tB. of rice wine vinegar and a dash of sriracha (or more if you like it spicy). Let the mixture come to a boil so the peanut butter melts and the sauce is incorporated and then allow it to simmer. Season your sauce with salt and pepper to taste and allow it to thicken while you cook your chicken.

In a hot pan, add 1/4 cup of oil of grapeseed oil over medium-high heat. Begin to saute your chicken cubes in the hot oil, allowing them to get a good sear on one side before beginning to mix them around. Once your chicken begins to brown, you can give it a nice toss and then season with salt and pepper. Allow your chicken to cook another couple minutes without touching so it continues to get a nice sear and then add your sauce to the chicken mixture (just enough so that it coats the chicken – you may NOT need to use all of your sauce, so pour slowly). Allow the chicken to finish cooking in the sauce. Finally, add 1 cup of cashews and mix well so that cashews are evenly coated with your peanut sauce as well. 

We like to serve this with plain white rice in my house. However, last night I realized that the leftover peanut sauce – mixed with a little HOT chili oil – would have made for a killer sesame noodles if I had Lo Mein noodles on hand. Next time!
Featured

Cacio e Pepe Kugel

I went there and I ain’t ever going back. To be honest, I’ve never really been a fan of a sweet noodle kugel, so it was time to amend tradition to the likes of my family and myself and BOY OH BOY is this a winner. Also, SUPER easy to make, so I’m typing up this bad boy on the eve of the 2nd night of Rosh Hashanah since you still have time to REALLY impress your friends and family this evening.

SHOPPING LIST: 2 packages egg noodles, butter, parmesan cheese, cottage cheese, sour cream, 2 eggs, olive oil, salt, black pepper

As always with any casserole, brush your glass baking dish with olive oil and pop in your oven while it is pre-heating to 375 degrees so your dish can get hot while you are prepping your kugel. This will ensure that your kugel has a crisp bottom and sides!

In heavy salted boiling water, par-cook your egg noodles (about 5 minutes). Toss your noodles in olive oil after straining so they don’t stick together.

In a large bowl, crack and beat two large eggs. Add 16 oz. of cottage cheese, 4 tB. of sour cream, 1 tB. of FRESHLY CRACKED black pepper, 1 tsp. salt, and 1 cup of grated parmesan cheese. When the mixture is incorporated, add 1/2 cup of melted butter. Finally, add your par-cooked egg noodles, mix well and then dump the entire kugel mixture into your piping hot baking dish.

Finish with a generous layer of parmesan cheese (maybe another 1/2 cup), another tsp. of black pepper and a sprinkle of salt. Bake at 370 for 25 minutes, making sure to turn the baking dish so the top of your kugel browns evenly. THE CRISPY NOODLES ARE EVERYTHING. (Like I do with pizza, AND because honey is so fitting with the Jewish New Year, I would highly encourage you to enjoy this insane cacio e pepe kugel with a drizzle of honey and a sprinkle of red pepper flake).

This might be the first dish I’ve ever invented for the Jewish holiday that might become a staple in my house all-year-round. It’s literally like an extra crispy white baked ziti. Whatever it is, there wasn’t a bite left (that may or may not have been my doing). Enjoy and Happy New Year to all those who celebrate.

Featured

Crispy Lemongrass Tofu

If you did NOT try my Vietnamese Lemongrass Chicken, do yourself a favor and check it out 🙂 If you aren’t into chicken, or you are looking for a simpler recipe with a similar flavor profile, this tofu recipe is everything. When the Prince and I traveled through Vietnam, we literally looked to eat as many plates of crispy tofu as we could. I think it’s best when it has the lemongrass bits, although plain Jane over here could go either way. The OMG moment I had when developing this recipe (because I first tried it with extra firm tofu) is that Nasoya SUPER FIRM tofu EXISTS and that is exactly what you need for this dish.

SHOPPING LIST: 2 packages super firm tofu, grapeseed oil, soy sauce, chopped garlic, fresh chopped ginger, dried lemongrass, salt, pepper

I’m going to link here a similar version of the lemongrass I used because you want to make sure you are using a FINELY cut product like THIS. Lemongrass isn’t always the easiest thing to find fresh so using a dry product allows us to get the same result with an ingredient that is accessible to most everyone.

The BEST part of this super firm tofu is it doesn’t require all the work of pressing out the excess liquid like other tofus do. So first, open your two tofu packages. You are going to turn each tofu cube on it’s side and make 2 equal horizontal slices so you end up with 3 flat tofu pieces. Keep the tofu stacked on top of one another, flip it onto the un-cut surface, then make 3 slices in one direction, and then 3 equal slices in the other direction (so each slice of tofu renders 16 cubes). Repeat this process on both cubes and then lightly pat try all of your tofu cubes with a paper towel. Throw your tofu cubes in a bowl and top with 1/2 cup of soy sauce. Allow the tofu to marinade for 20 minutes, tossing frequently, and then pat try again after the tofu has absorbed the soy flavor.

In a skillet or saucepan, heat 1/2 cup of grapeseed oil over medium-high heat. Add 2 heaping tB. of chopped garlic, 2 tB. of chopped garlic and 1/3 cup of dried lemongrass. Sauté until the garlic begins to get some color. Next, add all of your tofu cubes and give them a quick toss to marry with the garlic and lemongrass. Then, STEP AWAY, and allow the tofu cubes to brown for 3-4 minutes before tossing again. When trying to get things crispy, it’s important to allow the surface area of whatever you are browning to really CONNECT with the surface area of your hot pan/hot oil to give it time to brown thoroughly. This is a very simple dish, but the KEY is to ensure you achieve that crispy TEXTURE! After your tofu gets it’s initial sear, you can begin to move your cubes around in the oil with a wooden spoon, ensuring that every side of cube has the opportunity to brown. Season your tofu with a GENEROUS amount of salt and pepper – TOFU is notoriously bland, so I would go as far as a full tsp. of each. Last note, TOFU IS ABSORBENT – so if your oil runs dry (like mine did) add an extra 1/4 cup to continue frying your tofu until it’s golden brown all sides!

Finish with an extra sprinkle of salt before serving. I like to serve mine with Sweet Chili Sauce – because WHY NOT? it’s store-bought and delicious – but you could also serve this dish with an easy soy dipping sauce: 1/2 cup soy sauce, 2 tB. chopped scallions, 1/2 tsp. sugar, 2 tsp. sesame oil and 2 tsp. of rice wine vinegar.

Featured

SPICY Lobster Vodka Pasta

What says Saturday night like vodka and pasta?! Sounds like a party to me! While I’m always singing the praises of using your favorite store-bought products to make life easier, this vodka sauce is from SCRATCH and it actually makes a world of difference. As always, feel free to omit the lobster if it’s not for you. Last note, the pasta shape here is called “GEMELLI.” My brother’s girlfriend is a pasta enthusiast, so we’ve spent the summer uncovering loads of new noodle shapes and we gotta say, the tight twist of these short noodles gives them the PERFECT chew (if you cook them right, of course – which you will because you will follow these directions and everything will be perfect – or you didn’t get the recipe from me)

SHOPPING LIST: 1 lb. pasta (gemelli, preferred), 1 lb. lobster meat, tomato paste, chopped garlic, vodka, heavy cream, olive oil, butter, parmesan cheese, red pepper flakes, salt, pepper

You are going to get two pots going. One sauce pot with heavily salted water to par-cook your pasta and another wider sauce pan for your vodka sauce. As usual, I like to use the larger saucepans with the higher, flat sides so we have room to finish cooking our pasta in the sauce.

In your saucepan, you are going to heat 2 tB. of olive oil over medium heat. Add 2 tB. of chopped garlic and sauté until translucent. (If you want to add 1/2 cup of chopped onions here, GO FOR IT! You know by now the Prince still picks onions out of his food so we opted out). Next, add 1/2 a tube of tomato paste (about 1/2 cup), and sauté for another 3-4 minutes. Deglaze your pan with 3/4 cup of vodka (BE CAREFUL! IT MIGHT FLARE UP! THAT’S OK!) and allow the vodka to cook down for 5 minutes to burn off the alcohol. Finally, add 1 cup of heavy cream and allow your sauce to simmer. Add 2 heaping tB. of red pepper flakes and season with salt and pepper to taste. SPICY is in bold for a reason, so if you don’t want your sauce to have a serious kick, use less pepper flakes.

Allow your gemelli (or whatever pasta you choose) to boil for about 8 minutes, or until it still has a firm chew in the middle. Before you strain your pasta, add 1/4 cup of your pasta water to your vodka sauce and allow your sauce to continue to simmer. Add 1/4 cup of butter and 1/2 cup of grated parmesan cheese to your sauce and top with all of your steaming hot pasta to help melt the butter and Parm. Using a wooden spoon, mix well until the sauce is incorporated into the noodles. Then add 1 lb. of your roughly chopped lobster meat and mix again. I bought my lobster at my local seafood store, but you could always boil 6-8 lobster tails (fresh or frozen) in salted water if you can’t find fresh picked lobster meat and remove it yourself. Continue cooking your pasta in your simmering vodka sauce until your noodle has gotten to the perfect consistency and then serve immediately. As my Father-in-Law likes to say, “hot food’s hot!”

Featured

Jerk Halibut with Peach Salsa

In honor of me being back at home, back to focusing on cooking and writing, we’ll kick it back off with a little two-fer — everyone’s favorite! On one of my first trips to Jamaica I brought home Grace’s Jerk Seasoning to try to bring a little bit of Scotchie’s back to NYC. This stuff is SERIOUSLY hot so I like to balance it with a bit of coconut milk and serve whatever marinated protein (in this case, halibut) with a heaping helping of a fruit-forward salsa. Let’s do it!

SHOPPING LIST: 2 lbs. halibut, Grace’s Jerk Seasoning, 1 can coconut milk, 1 peach, 1 tomato, 1 jalapeño, 1 lime, adobo seasoning, salt, black pepper

The first thing you are going to do is marinate your fish. Slice your halibut into individual servings, about 2×2 inches, and season both sides of the fish with your classic adobo. In a bowl, combine 4 tB. of Grace’s Jerk Seasoning with 1/2 cup of coconut milk (make sure to shake the can before opening). Pour the seasoning over your fish and mix well in a bowl, or you can add your fish and marinade to a large ziplock and massage it gently. Allow the fish to marinate 30 minutes or so.

In the meantime, let’s get to that salsa. Chop up one large peach and one large tomato into even cubes. If you can find a YELLOW tomato I actually love that for this salsa for the uniformity in color. Combine the chopped peach and tomato in a SMALL STRAINER and then dice 1/2 a fresh jalapeño VERY finely. (This is one of those recipes that could totally have 1/4 of a diced red onion as well but the prince doesn’t love onion I didn’t include it this time). Add your jalapeño to the salsa and season with salt and pepper. Mix well and then allow the strainer to sit over the sink for 10 minutes because the salt will draw liquid from your fruit and vegetables and you want to get rid of this excess liquid. After the ten minutes, put your simple salsa in a serving bowl and finish the zest and juice of one lime. Mix the lime in and you’re good to go.

Now get your BBQ nice and hot and you’re going to grill your fish until its fork tender and almost falling apart. That’s what I love about halibut – you can easily tell when it’s perfectly don’t when the ends beautifully flake off. The fish is going to take about 4 minutes on each side. The key for me is to keep lathering the fish in the excess marinade while it’s cooking. The more the merrier. Serve up your freshly grilled halibut with your beautiful peach salsa and let the combination of sweet and spicy flavor your evening.

Featured

Grilled Cabbage + Avocado Caesar

By now you probably know I love cabbage – I wrote an Ode to Cabbage, gave cabbage the Cacio e Pepe treatment, braised it in peanut butter, and created a bunch of slaws like this and this. I’m always shocked when people come over and have never thought to throw their cabbage on the grill before – it’s one of my favorite summer hacks – but it was time to step it up a notch, or two!!!!! The combo of the grilled cabbage, and the melt-in-your-mouth grilled avocado, is a certified winner!

SHOPPING LIST: 1 head green cabbage, 2 ripe avocados, Caesar dressing, shaved parmesan cheese, coconut oil, salt, pepper, onion powder

The first thing we are going to do is slice the end off the cabbage and remove any outer dirty leaves. Then, slice your cabbage into thick-cut steaks. Brush both sides of the cabbage with coconut oil and season both sides with salt, pepper, onion powder. Slice your avocados in half, remove the pits, and then rub the avocado flesh with coconut oil and season again with salt and pepper. On your outdoor barbecue, grill your cabbage steaks until they are nice and charred on both sides – about 5 minutes on each side. When you flip the cabbage steaks, throw on your avocado, flesh-side-down, and allow the avocado to grill for 3-5 minutes until it has beautiful char marks. Bring your grilled vegetables inside and place the cabbage steaks on a cutting board and give them a rough chop.

Place the chopped, grilled cabbage on your serving dish and then use a spoon to remove the flesh of the halved avocado in one piece. Slice the avocado halves into three equal pieces and then evenly distribute the charred avocado slices on top of your bed of grilled cabbage. Finish with a GENEROUS drizzle of homemade Caesar OR your favorite store-bought dressing (I love the Primal Kitchen version). Final touch – disperse a handful of SHREDDED parmesan and that’s all she wrote. Honestly, I have never grilled avocado before – and this is simply too good to be true. Throw some grilled shrimp or chicken on this and you could have an ENTIRE meal on one platter.

Featured

Macaroni Pie

In college my friend used to whip up his famous “macaroni and cheese” using milk, American cheese and angel hair pasta. So simple yet so satisfying. This is sort of an homage to that, but more so it’s just an interesting way of serving a spaghetti side-dish in a unique, sliced manner. I put my French cooking education to work here – making a quick béchamel to really help bind the pasta and keep each bite creamy and delicious.

SHOPPING LIST: 1 box angel hair pasta, 1 stick unsalted butter, 2 eggs, AP flour, milk, American cheese, shredded mozzarella, parmesan cheese, ground mustard, nutmeg, salt, pepper

First, wipe your skillet with olive oil and throw it into a 375 degree oven to pre-heat while you’re prepping. Since we are using a long pasta, I actually like to boil the pasta water in a wide, shallow saucepan. (You can totally use 2 pots for this and cook your pasta + prepare you sauce simultaneously but for the ease of filling your sink with dishes I am going to explain this a 2-part process.)

Especially since this is a BAKED pasta recipe, we are going to make sure to UNDERCOOK our angel hair – no more than 6 minutes!! Strain your al dente angel hair (reserving a 1/2 cup of pasta water JUST in case) and immediately give it a toss in about 1/2 cup of olive oil to ensure the strands don’t stick together. I like to use tongs to mix the pasta with the olive oil to really make sure that your strands are well-coated.

Once your pasta is strained, you can give the same pot a quick cleaning and use it for your b̩chamel. Melt the entire stick of butter over medium heat. When your butter is totally melted, add 1/2 cup of flour and whisk well. Bring the heat to medium-high and allow your roux to begin to bubble and cook. I like to cook my roux for about 90 seconds. Add 4 cups of milk and continue whisking. Your milk will begin to thicken into a beautiful cream sauce Рyour basic b̩chamel. Turn your heat down to low and add 1/2 cup of shredded mozzarella and 4 slices of American cheese (I just rip the cheese with my hands). Season your b̩chamel with 1 tsp. ground mustard, 1 tsp. black better, 1/2 tsp. nutmeg and 1 tB. salt. (If your cheese sauce is getting a bit too thick, you can always thin it out with some of your pasta water.)

Add your pasta directly into your cheese sauce and mix thoroughly. Give both eggs a quick mix in a cup and then add them directly directly into the pasta mixture, using your same tongs to really incorporate everything. After the egg is mixed in, remove your hot skillet from the oven and add the pasta directly into your hot skillet, using a spatula to flatten the top. Finish with 1/2 cup of parmesan cheese and a final sprinkle of salt and pepper.

Bake your Macaroni Pie in the oven for 18 minutes (rotating half-way through) or until the parmesan is starting to brown and bubble. ALLOW the pie to cool! If you serve this too hot, you won’t be able to cut perfect slices of macaroni pie. This is an awesome dish to bring to other people’s houses because it presents really beautifully and can be re-heated quickly and easily since it’s served in the cooking dish. The only problem about bringing it to someone else’s house (as I learned this weekend) is then you don’t have the leftovers. Oh, the things I would have done with that Macaroni Pie.

Featured

Grilled Zucchini Salad

I know what you’re thinking: SHE DID IT! Sure did. Found a delicious and simple way to serve up all that zucchini from your garden. DISCLAIMER: I think I killed my garden after the first couple harvests so this zucchini is actually from a friend’s garden but the funny thing about gardening is like – you could just let your friend do it for you – the zucchini tastes the same no matter who grows it. Ha!

SHOPPING LIST: 3 zucchini, 1 lemon, ricotta salata, hazlenuts, chopped garlic, olive oil, truffle oil, garlic salt, pepper

Thinly slice your zucchini LENGTHWISE so you have long, thin zucchini ribbons. In a small bowl, combine 1 cup of olive oil with 2 tB. of truffle oil and 2 tB. of chopped garlic. Mix well and use a pastry brush to smother your zucchini ribbons in your homemade garlic-truffle oil. Sprinkle each side of the zucchini with garlic salt and pepper. Give them a QUICK grill – about 2/3 minutes per side – you want LIGHT grill marks so you’re zucchini ribbons are soft and pliable.

Pile your grilled zucchini ribbons on your serving plate. Freshly grate 1/2 cup of ricotta salata directly over the zucchini and top with 1/3 cup of chopped macadamia nuts (or toasted pine nuts or hazelnuts would work well here too). Finish with the zest and juice of one lemon to brighten all of the flavors. A sprinkle of red pepper flake would also be a nice finishing touch here – pulling double duty with a splash of HEAT and COLOR!

Featured

Ginger Scallion Cauliflower

If you follow my instagram @TheGluttoness you’ll know a couple of things – I have been addicted to my own Ginger Scallion Sauce and I’m always looking for an easy way to spice up my family’s favorite – roasted cauliflower. **Granted, I usually keep a plate of plain roasted cauliflower for the kids before I take a quick detour to flavortown**

SHOPPING LIST: 3 heads cauliflower, 1 bunch of scallions, ginger knob, chopped garlic, jalapeno (optional), lime, olive oil, coconut oil, sesame oil, salt, pepper, garlic power, ginger powder

You know how this goes. Preheat your oven to 400 degrees, using the convection function if you have that option. Remove the florets from your cauliflower and lay on a sheet pan. Drizzle with melted coconut oil and season with salt, pepper, garlic powder. Toss well so all of the florets are equally coated in oil and seasoning and bake for 40 minutes. 

While your cauliflower is cooking, mix up a batch of your Ginger Scallion Sauce. Drizzle 4-5 tB. of your Ginger Scallion Sauce over your cauliflower and finish under the broiler for 5 minutes. Give the cauliflower another 5 minutes to cool after removing from the oven – I find that allowing the cauliflower to cool gives it a minute to “set” whereas sometimes the florets are too soft to move right out of the oven. Finish with an extra drizzle of your sauce, because WHY NOT!!!!!!! and then instantly question why people eat plain roasted cauliflower in the first place.

Featured

Macadamia Nut Pesto

Remember that incredible Blackberry Salad with the macadamia nuts?! Well I had some leftover macadamias and the ONLY good thing my house renters did was leave me a ton of fresh basil so it only seemed natural to riff on a classic pesto (which usually has pine nuts).

SHOPPING LIST: fresh basil, macadamia nuts, chopped garlic, parmesan cheese, olive oil, lemon, salt, pepper

Give you fresh basil a quick rinse and dry and then you want to get about 2 cups of basil leaves into your food processor. Top the clean basil leaves with 1/2 cup of macadamia nuts, 3/4 cup of parmesan cheese, 2 heaping tB. of chopped garlic and the juice of one lemon. Lastly, add 1/2 cup of olive oil and begin to pulse your food processor until your pesto becomes chunky and emulsified. If your pesto needs more liquid, add 1 tB. of olive oil at a time until it’s easily blended. Finally, add two pinches of salt and one pinch of black pepper and give it one last pulse to blend the seasonings. Your finished pesto should like so:

Now for your pasta. We’re really big fans of the Anna Long Fusilli pasta these days but you can use ANY pasta of your choice. Regardless of noodle, there are a few keys steps to really making this dish perfectly. First of all, make sure you are cooking your pasta in HEAVILY salted boiling water. You want to par-cook your pasta – for this dish I cooked the pasta for 11/12 minutes – and then retain 1/2 cup of the pasta liquid before straining your pasta.

To finish your pesto pasta, add 2 tB. of olive oil (or even butter) to a saucepan with the 1/2 cup of pasta water and 3/4 cup of your pesto sauce and heat over medium heat. The pasta water and oil will loosen your pesto and create a creamier sauce. Re-add your pasta to the pan and continue to cook the pasta 2 minutes in the pesto sauce. Finishing your pasta this way will allow the pasta to really soak in and absorb all of the flavors of the pesto. Give the dish and another pinch of salt and pepper and quick toss before serving. A little red pepper flake would be a nice touch here if you’re cooking for people who like things to have a kick (like me).

** Side Note ** I also love thinning out this pesto recipe – 1/2 cup of pesto with 2 tB. of apple cider vinegar – to create a pesto vinaigrette to use as a dressing for salads or grilled vegetables.

Featured

Bacon-Wrapped Shrimp with Rosemary Apricot Glaze

I know the name is a mouth-full but this gorgeous dish is actually super simple to execute. It’s got everything you want – the sweet, the salty, the crunchy, the supple shrimp and that herbaceous rosemary finish just brings it all home. Also, I’m just *really* having a moment with dried rosemary – my Fig + Rosemary “Baked” Brie has also been on repeat – I just love the earthiness it brings to these fruit-foward dishes.

SHOPPING LIST: 2 lbs. shrimp (peeled, de-vained, tails on), 1 package of bacon, apricot preserves, balsamic vinegar, dried rosemary, olive oil, salt, black pepper

Toss your shrimp with a few tB. of olive oil, salt and pepper so that they are well-oiled and seasoned. Always remember anytime you’re cooking, you want to season EVERY step of the way! Take your package of bacon and lay it flat on your cutting board. Cut the entire package in half so you each strip of bacon is now 2 shorter strips. Wrap each shrimp in a half strip of bacon, starting from the tail and wrapping the entirety of the mollusk. The bacon will be somewhat tacky and stick together if you wrap tightly enough.

While your BBQ is heating up, get an ALL METAL saucepan that you can put directly on your grill (you can TOTALLY do this step inside I just find it’s quite easy to do it together). Add 1 cup of apricot preserves, 2 tB. of balsamic vinegar, 2 heaping tB. of dried rosemary, a pinch of salt and black pepper. Place the metal saucepan directly on your BBQ so the apricot preserves can begin to melt into a glaze. Place your bacon-wrapped shrimp on the BBQ. Once your preserves melt, use a pastry brush to add the glaze to the bacon wrapped shrimp. Cook about 5 minutes and then flip your shrimp and continue with another coat of glaze. (If at any point your glaze is getting too hot or reduced, place an oven mit over the handle of your saucepan and remove from the heat). Cook for another 5 minutes or so and then give a final flip and a third coat of glaze. Because the shrimp is wrapped in the bacon, don’t worry so much about over-cooking them because it will take a bit longer for the heat to permeate through the bacon and thoroughly cook the shrimp. Remove the shrimp from the BBQ and finish with any remaining glaze.

Featured

Garlic Parmesan Zucchini Rounds

My first harvest. MAJOR! I planted these soup to nuts – built the garden, lugged the soil, planted the seeds, forgot to label them, wondered what I had planted and then basically hoped for the best. So to come back to a dozen GIGANTIC zucchini felt like such an accomplishment and thus here is a simple zucchini recipe. I feel like some people may refer to this type of recipe as “CHIPS” but honestly, chips are deep-fried potatoes lets not get ahead of ourselves.

SHOPPING LIST: 4 zucchini, parmesan cheese, olive oil, chopped garlic, salt, pepper, red pepper flake, garlic powder

The first step is to thinly slice your zucchini into rounds. It turns out zucchini and cucumbers not only look alike – they have similar water content – so in order for your zucchini to not end up water logged you MUST salt your zucchini rounds and let them sit in a strainer for a least an hour. I even like to wipe the extra water off the zucchini using a paper towel before moving forward. DO NOT skip this step!

Preheat your oven to 450 degrees. Lay your zucchini rounds on a rack over a baking sheet. (Again, using the rack OVER the baking sheet will allow the zucchini to continue to omit excess water.) In a bowl, mix together 1 cup of olive oil with 2 heaping tB of chopped garlic. Using a pastry brush, brush all of the zucchini rounds with the garlic-oil mixture, and then season with salt and pepper. REPEAT on both sides, making sure especially on the second side that you get all of those little bits of garlic on top of the zucchini. Finish your zucchini with about 1 tsp. of parmesan cheese PER round – you want them covered!!!!! And then a final sprinkle of garlic powder and red pepper flakes for additional spice and flavor.

Roast your zucchini rounds for 12 minutes and then BROIL for the final 5 minutes until the tops of your zucchini rounds are browned and bubbly. ALLOW the zucchini to cool so that the bubbly parmesan can set before serving. Anyways, like an influencer who gets married and warns “wedding spam coming soon” that’s basically going to be me with new zucchini recipes, 90 percent of which will probably include cheese.

Featured

Fried Brussels Sprouts

All Brussels Sprouts are NOT created equally. You know what I mean. Sometimes you go to a restaurant and they are like CRACK. The Smith in NYC immediately comes to mind. My dad’s country club in Philadelphia, Green Valley, also knows what’s up with frying Brussels sprouts. We used to love going to his club on Friday nights for happy hour on the lawn, mainly for the Brussels sprouts, but also because they had babysitters and bouncy houses for the kids and Mama. Had. Off!!!

SHOPPING LIST: 1 lbs. Brussels sprouts, vegetable oil, lime, kosher salt, Sir Kensigton’s Chile Lime Crema

First step is prepping your sprouts. Slice off the ends. Remove any dirty outer layer of leaves so you have clean sprouts and then slice them in half, through the root. I prefer to fry in a cast iron skillet but any steel pot will do. You want have about 3/4 inch of oil – this is a SHALLOW fry, as opposed to a DEEP fry. Get your oil smoking hot (or around 375 degrees if you are fancy and use a thermometer) and drop about 1 1/2 cups of sprouts at a time into your hot oil! It should take about 10-12 minutes for your Brussels to fry. I like to do it in batches, as you know, since over-crowding your pan is never a great idea. While your sprouts pop and sizzle away, set up a drying station (aka a rack over a sheet pan. Give them a quick toss about 6/7 minutes so all the sides can brown evenly. When your sprouts looked fried and crispy all over, remove them using a slotted spoon onto the drying rack and give them an IMMEDIATE sprinkle of salt.

Once your Brussels are cooled and salted, lay them on your serving dish and finish with a generous drizzle of Sir Kensington’s Chile Lime Crema, fresh lime zest and the juice of half a lime. Listen – I could easily give you the recipe to make your own crema, and then give you instructions to buy a squirt bottle (which is actually quite handy in the kitchen, anyways) so that you can properly drizzle your crema, but Sir Kesington’s not only made the exact product you want for this dish, but it comes in the perfect drizzly squirt bottle and everything DOESN’T have to be homemade to be homemade. Chew on that!

Featured

Blackberry Salad

True story. I have never used blackberries in a salad before. I love a Strawberry Salad (well, the Prince loves a Strawberry Salad so we make it often) but this Blackberry Salad was special. She was beautiful and luscious and an ideal, bountiful accompaniment for my favorite Foolproof Ribs. Also, salads like this are BEYOND easy to throw together. The hardest part is mixing up the homemade Honey Balsamic Vinaigrette which isn’t actually hard at all and you could totally just ignore me and use any store-bought dressing of your choice and call it a day.

SHOPPING LIST: 2 box arugula, 1 1/2 cups blackberries, feta cheese, macadamia nuts, balsamic vinegar (preferably aged), stone ground mustard, honey, apple cider vinegar, olive oil, salt, black pepper

Most times I toss a salad in the bowl before serving, but for this particular salad, I chose to serve it on FLAT, LONG serving dish so that entirety of the arugula base was covered in all the goodies and then I made sure to go heavy on the dressing. (ALSO – serving extra dressing on the side is always a good idea).

So, using a FLAT, LONG serving dish, create a thin bed of your arugula. Obviously, wash and dry your blackberries and then scatter them around the dish. Continue this same method with your macadamia nuts (WHAT AN UNDERUTILIZED NUT!!!!!!!) and your crumbled feta. I have to admit here – I actually used a Black Pepper Crumbled Feta that I found at Whole Foods, which, for a pepper enthusiast like myself, was an awesome win! OR, if you can find a creamy Bulgarian Sheep’s Feta that you crumble yourself that’s always an awesome choice as well.

For the dressing, mix together 2 heaping tB. stone ground mustard, 1 tB. balsamic vinegar, 2 tB. apple cider vinegar, 1 tB. honey, 1 tB. olive oil, a pinch of salt and a pinch of pepper. You are going to mix your dressing together and drizzle it all over your salad. I used the entirety of the dressing on my salad so if you want to follow my tip to serve extra dressing on the side than just double the recipe! Last note – since we aren’t tossing the greens in the dressing, I like to finish a salad like this with a sprinkle of salt and pepper. Yes, the dressing is seasoned, but this little extra splash of flavor will ensure that each bite is dressed and delicious.

Featured

Aunt Joan’s Crab Dip

My great Aunt Joan lives in Bethany Beach, Delaware – which, if you are unaware, is crab country! We would visit Aunt Joan every August when our entire family would head to Sea Colony (a magical place where we drank Mike’s Hard Lemonade at wild beach bonfires at 13, whoops!), and she would always have her famous crab dip waiting for us. I’ve worked hard to reverse engineer this dip based on my fondest memories, and I’m so excited to share this recipe with you all.

SHOPPING LIST: 1 lb. lump crab, whipped cream cheese, shredded cheddar, mayonnaise, chopped garlic, Worcestershire sauce, 1 egg, mustard, old bay, Tabasco, lemon, dried parsley, olive oil

The best thing about this dip is EVERYONE loves it (unless they are allergic to shellfish or KOSHER ha!), and it’s relatively easy to whip up and it’s perfect for entertaining. AS ALWAYS, grease your baking dish with olive and oil and pre-heat your dish in a 400 degree oven while you’re mixing up the dip so you can ensure extra crispy edges!!!

In a large bowl, crack and whisk one egg. Add 1 lb. of lump crab meat (or jumbo lump if you’re really fancy!), 12 oz. whipped cream cheese, 1 cup of mayonnaise, 1 cup of shredded cheddar, 1 tB. of mustard, 1 tB. Worcestershire sauce, 2 tB. Old Bay, 1 tB. chopped garlic, the juice of one lemon and 5 dashes of tabasco. Mix well, remove your hot baking dish from the oven, and fill the hot baking dish with your dip. Top with another cup of shredded cheddar and finish with a sprinkle of Old Bay seasoning and dried parsley flakes.

Bake your dip in a 400 degree oven for 30 minutes or until your dip is perfectly browned on top. Cover immediately with tin foil and allow to cool for 5-10 minutes so that you don’t permanently burn the roofs of your guests’ mouths.

This is seriously one of the BEST. DIPS. EVER. Serve it with a mix of crackers and crudite. Also — use this exact same mixture as a stuffing for baby portobellos! Bake them 15 minutes with the same shredded cheddar and dried parsley topping. Nothing like a good old 2-for-1 special!!

Featured

Blue Cheese + Balsamic Portobellos

Grilling portobellos is a wonderful idea, except when it isn’t. You know sometimes these giant mushroom caps just end up flavorless and soggy. Except of course, for my Portobello Pizzas which are obviously excellent – and now you have this new, super easy recipe, which, for a simple mushroom side dish is totally DECADENT and satisfying.

SHOPPING LIST: 4 portobellos, crumbled blue cheese, balsamic glaze, olive oil, truffle oil, salt, pepper, garlic powder

The first key to a nicely grilled portobello is making sure it’s properly oiled before grilling. I mentioned above that they can become soggy (and that’s because mushrooms naturally omit a bunch of water when cooked) but conversely, if they aren’t properly oiled they can become DRY, equally not cool. I like to mix 1 tB. of truffle oil with 1/2 cup of olive oil to use for these mushrooms. Truffle oil isn’t typically used for cooking, but mixing it with the olive oil will infuse your portobellos with a mild truffle essence. Remove the stems from your portobellos and then make sure your mushrooms are evenly coated with the blended oil on BOTH sides – and then generously season each side with salt, pepper and garlic powder.

Make sure your grill is SMOKING hot and start grilling your mushrooms STEM(less) side down. Grill your mushrooms about 8 minutes, letting all of the liquid drip into your BBQ so you won’t have soggy shrooms. Flip your portobellos and top each with a HANDFUL of blue cheese crumbles. DON’T be stingy. The use of blue cheese is really ideal here because the flavorful, blistered cheese really becomes the star of the show. Shut your BBQ and cook for another 8 minutes. You will see the edges of your mushrooms become almost CRISPY – this is what you’re looking for!!!!!

Remove the grilled portobellos and drizzle with your favorite balsamic glaze. REGULAR balsamic vinegar will NOT do the trick here. You need the sweeter glaze to balance the stinky cheese. Also, thick store-bought balsamic glaze drizzles beautifully and who doesn’t love a beautiful drizzle?

Featured

Burrata, Sausage + Peppers

If you follow my feed you know that Sausage + Peppers is a major go-to for me. Why? Especially when it’s grilling season, it’s just such an easy way to create a comprehensive dish that feeds many. I always switch it up a little, but this time I think I really found the KEY to taking this dish OVER THE TOP. Burrata!!

SHOPPING LIST: 2 packages of mini bell peppers, 2 lbs. sausage links, onion, chopped garlic, olive oil, truffle oil, tomato sauce, salt, pepper, onion powder

Before we get into the cooking, let’s talk sausage for a second. I used two packages of Nature’s Promise Sweet Italian Chicken Sausage with Kale. You can use WHATEVER kind of sausage you want – sweet, spicy, pork, chicken, have creative freedom here but like maybe not lamb – this isn’t THAT kind of dish. Now turn your BBQ on high heat and get it ready for some action.

The first thing you want to do is cut the stems off of your little sweet peppers. Put your peppers in a bowl and give them a generous drizzle of olive oil (about 1/4 cup). Add 2 tB. of chopped garlic, and season well with salt, pepper and onion powder and give them a good toss so all of your peppers are coated with oil and seasoning. Throw the peppers on one side of your grill and your sausages on the other. You want your peppers to be blistered on both sides and SOFT, they will easily “squish” for lack of a better word between your grill tongs. For the sausage, make sure to grill them THOROUGHLY, until they are charred on the outside and contrasty, are FIRM between your tongs.

Return your cooked peppers to your prep bowl as they are finished and top withy our cooked sausage. In the bottom of your serving dish, add 1 cup of your favorite marinara sauce, mine has always been Rao’s Arrabiata (sometimes I like to use a few tB. of pesto sauce instead of/ or in addition to the red sauce) and a drizzle of truffle oil. Then, on a cutting board, slice your sausages into about 1 1/2-inch thick pieces. Add all of your peppers and sliced sausages on top of the marinara and truffle oil and toss well. Top with four small balls of SLICED burrata so your guests can see the creamy stracciatella on the inside. If you can’t find the smaller burrata, you can always cut a large ball into quarters — AND YOU CAN ALWAYS ADD MORE CHEESE, because, trust me, sausage and peppers WITH cheese is better than sausage and peppers WITHOUT!

Featured

Spaghetti Carbonara

The other night my daughter wanted a side of eggs with her pasta. It felt like the right time to educate her on the origins of my absolute favorite pasta dish. I touched on this a bit in my Cauliflower Carbonara recipe, how my favorite version ever is at Maccheroni in Rome – but let’s be honest, NOTHING is as good as the real deal. And the truth is, it’s not very difficult at all. Now let me say ONE more thing before I begin. Many years ago when The Gluttoness worked for AlwaysHunrgyNY, I had the pleasure of learning how to make this dish from the incredible Chef Cesare Casella and he used a drop of cream and therefore, so do I.

SHOPPING LIST: 1 box spaghetti, 1 package bacon, 3 egg yolks, 1/4 cup cream, salt, black pepper

Rough chop your entire package of bacon and start it in a COLD pan over medium heat. While your bacon is cooking, bring a pot of HEAVILY SALTED water to boil. Par-cook your spaghetti, and when your spaghetti is a true al dente and still a touch firm in the center, strain your pasta and reserve 1/4 cup of your pasta liquid. Toss the spaghetti in olive oil to prevent it from sticking together.

When your bacon is crisp and all the fat is rendered, add the 1/4 cup of pasta water and 1/4 cup of cream and bring to a simmer. When the liquids are simmering, add your pasta back to the pan and continue cooking 3-5 minutes or until the sauce has thickened and coated your pasta. Season with salt and pepper to taste. Transfer your pasta to your serving dish. Top you with your three egg yolks. Use a tongs to IMMEDIATELY toss the yolks into your pasta.

Featured

Hot + Cold Tomato Mozzarella

With summer upon us and the local farmers’ markets bursting with gorgeous produce, a tomato-mozzarella salad is always an easy go-to! I have a few ways I like to spruce up this class dish – both in flavor and presentation. Let me just say this – this success of this salad is 90% how fresh your ingredients are, especially your mozzarella.

SHOPPING LIST: 2 beefsteak tomatoes, 1 ball FRESH mozzarella, 1 lb. cherry tomatoes, olive oil, chopped garlic, pesto sauce, salt, pepper

I like to use my toaster oven for smaller projects like this. Pre-heat your toaster oven on the CONVECTION mode to 375 degrees. Lay out a peice of tin-foil, folding the ends up so it makes a bit of a perimeter and add all of your cherry tomatoes. Drizzle the tomatoes with olive oil and 1 tB. of chopped garlic. Mix well and season with salt and pepper. Roast the tomatoes 10 minutes or until they are just bursting at the seems!!!

While your cherry tomatoes are cooking, THICK slice your tomatoes and mozzarella. This is part of the trick of making an impressive looking dish. No one wants measly slices. Beautiful thick-cut slices of tomato and mozzarella speak for themselves. Once you layer your slices, tomato/mozzarella/tomato/mozzarella/etc. I like to sprinkle the entire platter with salt and pepper.

For me, what makes this dish special is the difference in temperatures. After your slice and plate your fresh tomatoes and mozzarella – POP THE PLATE IN THE FRIDGE! Chilling your tomatoes and mozzarella before topping them with the warm, blistered cherry tomatoes will add to the contrast of hot and cold.

Finish your platter with the warm cherry tomatoes, fresh out of the oven, and finish the platter with a drizzle of your favorite PESTO. (You want it to be a drizzle, so if you’re pesto is a bit thicker, you can always thin it out with some fresh squeezed lemon juice or apple cider vinegar).

Featured

Spicy Fennel Salad

The first Fennel Salad we made was a bit involved – it had a base of lemon whipped ricotta and grapefruit supremes. While delicious, those extraneous elements take TIME and sometimes you just want to whip up a quick and simple salad on the fly. This is that fennel salad.

SHOPPING LIST: 2 fennel bulbs, 1 jalapeño, shredded parmesan, lemon, olive oil, salt

Remove the stems, fronds and core of your fennel bulbs so you’re left with something looking similar to the size of an onion, making sure to KEEP some of your fronds to finish your salad. Slice each fennel bulb in half, and then very carefully THINLY slice your fennel — if you keep a mandolin on hand, this would be a GREAT opportunity to use it, the thinner the better!!!

Add your sliced fennel to your serving bowl. Next, thinly slice your entire jalapeno (or less if you don’t want it SO spicy) and add that to you fennel. Top with 1 cup of SHREDDED parmesan, making sure you get lots of those larger pieces in the mix. Use a microplane to remove the zest of the entire lemon directly on top of your parmesan, and then squeeze the juice of the entire lemon over your salad.

Grab a handful of the fennel fronds you kept and give them a rough chop and add them to your salad .Finish with 2 tB. of HIGH QUALITY olive oil and 1 tsp. of salt. Give your salad a quick toss and that’s it. Easy, fresh, spicy, and bright with a hint of the salty, nutty parmesan, this salad is truly one of life’s simple pleasure.

Featured

Warm Bacon + Onion Salad

This salad demonstrates how a little bit of bacon can transform your peppery arugula greens from basic to bonkers. This salad is warm and cozy like a fuzzy blanket on a rainy day. Add some chopped grilled chicken or shrimp and it could be a meal in itself!

SHOPPING LIST: 1 box of arugula, 1 package bacon, red onion, blue cheese, dried cranberries, stoneground mustard, apple cider vinegar, olive oil, salt, black pepper

Rough chop 6 pieces of bacon, keeping the pieces fairly large as they will shrink while cooking. As always, start your bacon in a cold pan and then put the heat over medium-high. While your bacon is sizzling, fill your serving bowl with the arugula. Top with 1/3 cup of dried cranberries and 1/3 cup of blue cheese crumbles and set aside.

Slice 1/2 a red onion. When your bacon is sufficiently browned, use a slotted spoon to remove the bacon from the grease, placing it on a paper towel to strain the excess oil. Add your sliced red onion to the bacon grease and sauté until soft and golden. Season your onions with salt and pepper. Again, using a slotted spoon, add your onions on top of your arugula and your crispy bacon bits as well.

In a small bowl, combine 2 tB. stone ground mustard, 2 tB. apple cider vinegar and 1 tB. and whatever bacon grease remains in your pan . Mix well and season with salt and pepper to taste. Drizzle over your arugula salad and give the salad a quick toss so the mustard-bacon dressing really coats all of your greens.

Using a green like arugula is great for a salad like this because it can hold up to the warmth of the onions. Other friends you might want to add to this party? Our favorite quick candied pecans, a diced avocado (tossed in lemon juice, of course) or the addition of ANOTHER green – like frisee – would be wonderful as well!

Featured

Tomato and Feta Cauliflower

Here we go again. Another night staring at a few heads of cauliflower and trying to figure out how to make it interesting. Thankfully, my love affair with sun-dried tomatoes IN OIL continues (see the 3-Way Tomato Salad for more sun-dried tomato inspo).

SHOPPING LIST: 3 heads of cauliflower, sun-dried tomatoes in oil, feta cheese, coconut oil, salt, pepper, garlic powder

Preheat your oven to 400 degrees, using the convection function if you have that option. Remove the florets from your cauliflower and lay on a sheet pan. Drizzle with melted coconut oil and season with salt, pepper, garlic powder. Toss well so all of the florets are equally coated in oil and seasoning and bake for 40 minutes.

The key here is actually the super garlicky oil that that sun-dried tomatoes are preserved in. Once your cauliflower is done roasting, use a large spoon to drizzle about 4-5 tB. worth of the oil over your cauliflower and place the tray under the broiler for 3-5 minutes or until your cauliflower is blistered.

Remove the roasted florets into your serving dish and add 1/2 cup of sun-dried tomatoes (removed from the oil) and 1/2 cup of feta. I chose NOT to slice the sun-dried tomatoes because I thought they looked beautiful full-sized against the larger cauliflower florets – but you could totally give them a rough chop or slice them in half if you prefer smaller bits. Just remember, at many gourmet markets you will find specially packaged “sun-dried tomato olive oil” so purchasing your sun-dried tomatoes IN OIL actually gives you two products in one! You can also use this garlicky tomato oil in your salad dressings, as a drizzle for a classic tomato/mozzarella salad, or even as a topping on pizza!!

Featured

Vietnamese Lemongrass Chicken

I had the ABSOLUTE pleasure of traveling to Vietnam with my husband when the world was normal and traveling was a thing and there are a FEW dishes that stick out in my mind – one in particular was the lemongrass chicken at Cuc Gach Quan. It’s just one of those restaurants where you feel like someone’s grandmother is in the kitchen, and you’re eating in their living room, and each dish is more incredible than the next. Needless to say, I’ve never had Lemongrass Chicken like theirs, so the next best option was to do it myself!

SHOPPING LIST: 3 chicken breasts, jalapeño, scallions, chopped garlic, dried lemongrass, grapeseed oil, fish sauce, soy sauce, salt, pepper

I’m going to link here to a similar version of the lemongrass I used because you want to make sure you are using a FINELY cut product like THIS. Lemongrass isn’t always the easiest thing to find fresh so using a dry product allows us to get the same result with an ingredient that is accessible to most everyone.

Chop your entire bunch of scallions and thinly slice your jalapeno. In a saucepan, add 1/4 cup of grapeseed oil over medium heat. Add your scallions, sliced jalape̱os, 2 heaping tB. of chopped garlic and 1/4 cup of your dried lemongrass. You want to really fry your spices for 5-10 minutes. In the meantime, chop your chicken into cubes. (As a very good Indian friend taught me, DO NOT season your chicken yet because it will omit too much water РWAIT until your chicken is nice and browned).

When you spices are browned and fried, add your chicken, increase to high heat and DO NOT TOUCH YOUR PAN. Let it really get a nice brown on one side. After 5 minutes, give it a quick toss and 2 tB. of fish sauce and 2 tB of soy sauce. Use a wooden to spoon to remove all of the browned bits from the bottom of your pan and season with salt and pepper. Allow to cook another 7-10 minutes or until your chicken is fully cooked through.

I didn’t put any garniture because I really wanted you to see the bits of fried garlic, jalapeño and lemongrass on the chicken but if you have leftover scallions or fresh Thai basil a little bit of fresh herbs would be a lovely finishing touch.

Featured

Creamy Cucumber + Radish Salad

SHOPPING LIST: 2 English cucumbers, 2 radish, red onion, parsley, lemon, mayonnaise, salt, black pepper

Slice the ends off your English cucumbers and then thinly slice both cucumbers. Place all of your cumber slices in a strainer and toss with 1 tB of salt. Mix well and allow to strain 10-15 minutes so that some of the liquid leaves your cucumbers. This is a very important step if you are making this dish ahead of time so that it doesn’t become watery as your cucumber omit their natural liquids.

Next, thinly slice your radishes and reserve in a bowl of cold water until it is time to compile your salad. Mince 1/2 of a red onion and add to the bottom of your serving bowl. Rough chop a handful of parsley leaves – leaving you with about 1/4 cup of chopped parsley. Add your parsley to the onion.

Over a small bowl, use a microplane to remove the zest of one lemon. Add the juice of the entire lemon to the zest. Add 1/3 cup of mayonnaise (obviously my vegan friends can substitute with a plant-based alternative), 1 tB. of black pepper, 1 tsp. of salt and 1 tsp of red pepper flakes. Mix your dressing well.

Give your cucumbers in the strainer a final shake to remove the excess liquid. Add the cucumbers to your onions and parsley and then use the strainer to remove the liquid from your radishes as well. Once all of your ingredients are in the bowl, give your creamy lemon dressing an extra good mix and pour over the contents of your bowl. Toss your cucumber salad and CHILL. I love a salad like this to have to be served a little bit cold – also, the chill will keep your cucumbers CRUNCHY!

Featured

Fig + Rosemary “Baked” Brie

You know that Dalmatia Fig Jam that you always buy and put out with your cheese plates and MAYBE someone takes a spoonful and then you put it back in your pantry until you make another cheese plate? Or maybe that’s just me. Either way – let’s put that bad boy to FANTASTIC use. I know, “baked brie” doesn’t scream summertime – but this isn’t en croute. A full-sized wheel of brie in a cast-iron skillet with a fantastic topping makes this warm, gooey brie perfectly positioned at your picnic, poolside or dinner table. Just don’t forget the crackers.

SHOPPING LIST: large brie cheese, fig jam, dried rosemary, red pepper flake, walnuts, balsamic glaze, salt, black pepper

Unwrap your large wheel of brie and place it in the center of your cast iron skillet. In a small bowl, combine about 3/4 cup of your fig jam with 1/2 cup of walnuts. Add two pinches of salt, 1/2 tsp. black pepper, 2 tB. of dried rosemary and 1 tsp. of red pepper flakes and mix well. Top your brie with the fig mixture.

NOW – you have two options. You can either bake this in a 400 degree oven for 25-30 minutes OR since you are making this in a cast iron skillet, fire up your BBQ and you can GRILL your skillet for the same 25-30 minutes period. Grilling it will infuse the brie with a bit of a smokey flavor which is lovely as well.

When your brie is melty and popping at the seams, finish with a drizzle of balsamic glaze for an extra burst of tangy sweetness. Aside from traditional crackers, I love serving this with my favorite ever – Aurora Tostones – or a freshly sliced French baguette.

Featured

Grilled Shrimp and Halloumi Skewers

I mean you put grilled halloumi cheese in/on anything and you’re off to a great start. These simple shrimp skewers not only benefit from alternating cubes of this blackened, salty cheese, but the homemade lemon parsley marinade, which takes just seconds to whip up in your food processor, bathes each skewer in bright, beautiful flavor.

SHOPPING LIST: 1 lb. cleaned, deveined shrimp, halloumi cheese, cherry tomatoes, lemon, fresh parsley, chopped garlic, olive oil, salt, pepper

This made 4 skewers but they were tightly packed so you could totally stretch this and make 4-6 skewers with this recipe. Toss your raw shrimp in salt and pepper. Then take one package of halloumi cheese. My store-bought cube of halloumi allowed me to slice the brick into three horizontal slabs from which I made cubes, trying to emulate the size of the cherry tomatoes. I don’t know if you can tell from the photo but these heirloom cherry tomatoes were variations of green and red and just so beautiful. So begin skewering, shrimp –> halloumi –> tomato. When your skewers are set it’s time to make the marinade.

In your food processor, add the zest and juice of one lemon. Add one heaping tB. of chopped garlic and then about 1/2 a bunch of parsley leaves – it would be almost one cups worth of fluffy leaves. Add 1/4 cup of olive oil and process until you still have bits of parsley — this is NOT going to be a pesto or puree-like consistency but more like a thin dressing. Season with salt and pepper to tase and then rub your skewers with 3/4 of your marinade.

Get your grill blazing hot and grill your skewers about 4 minutes on each side – until your shrimp are cooked through and your cheese is nice and blistered. Before serving, drizzle the remaining 1/4 of your marinade over your finished skewers.

One thing to note is that the inclusion of the grilled halloumi is seriously be the STAR of these skewers for me. With that said, this would be a great idea for completely VEGETARIAN skewers. Layer up a bunch of your favorite veggies – slices of red onion, zucchini, tomatoes, what have you, with the cubes of halloumi and the same parsley lemon dressing for a super satisfying ALL vegetable meal.

Featured

Creamed Corn + Crab Pasta

My husband loves crab pasta. So when I’m feeling like a sport (ha!) I’ll grab a pound of lump crab meat. My typical crab pasta recipe is essentially the same as the Lemon Ravioli (a la Misi) – with a boatload of crab thrown in at the last minute. But you know me – always trying to think outside of the box – and always looking into my pantry for inspo. What else does the prince love? Crab and corn chowder. And because we’ve been loving a good (actually, GREAT!) cornbread around here, I always have canned creamed corn on hand.

SHOPPING LIST: 1 lb. jumbo lump crabmeat, 1 can creamed corn, 3/4 box of pasta, olive oil, butter, salt, pepper, red pepper flakes

Bring your pasta water to boil and make sure it is HEAVELY salted because you are going to use your pasta water. I added 2 tB. of olive oil to my pasta water as well because I was using angel hair pasta which I find particularly likes to stick together. As always, use whatever pasta you prefer or have on hand. Especially with angel hair, you want to make sure to PAR COOK your pasta so you can finish cooking your pasta in the super easy sauce. When it’s time to strain the pasta, make sure to save 1/2 cup of your pasta water.

In your sauce pan, melt 2 heaping tB. of. butter. When the butter is melted, add 1/2 cup of the creamed corn and 1/3 cup of your pasta water and bring to a simmer. Season to taste with salt, pepper and red pepper flakes (if you’re like me and want everything to have a kick but also, the red pepper flakes add a little pop of color). As your sauce thickens, add back your pasta and continue cooking over medium-low heat for 3-5 minutes until your sauce is thick and creamy (did you know that creamed corn is a NATURAL thickening agent?!?!).

At the last minute, throw in all of your lump crab. Give the pasta a quick toss and serve immediately. You do not want your crab to “cook” – so you could even do this last step in your serving bowl if you are nervous about your beautiful lumps of crab turning into mush – which will happen if you cook them too long. But you’re paying attention to my explicit instructions so that would never happen to you 🙂